00:00
00:00
PsychoGoldfish
I like turtles

Age 46

NG Code Monkey

Hard Knocks

Ur Mom

Joined on 9/26/00

Level:
14
Exp Points:
1,910 / 2,180
Exp Rank:
31,872
Vote Power:
5.57 votes
Audio Scouts
2
Art Scouts
2
Rank:
Town Watch
Global Rank:
47,786
Blams:
48
Saves:
130
B/P Bonus:
2%
Whistle:
Normal
Trophies:
49
Medals:
775
Supporter:
11m 29d

PsychoGoldfish's News

Posted by PsychoGoldfish - June 20th, 2022


In honor of passing 40k views, we got Team Sausage on live stream yesterday afternoon to do a playthrough with a bunch of commentary. You can now learn what was going through our depraved minds when we made the game, how to beat it, and how to get every medal!


Enjoy!


Users on the stream:


@psychogoldfish

@polliwopple

@jacob

@spadezer

@itsreddqueen

@mzza

@deluca


Tags:

17

Posted by PsychoGoldfish - June 17th, 2022


Update: WE MADE THE TANK TRIBUNE!


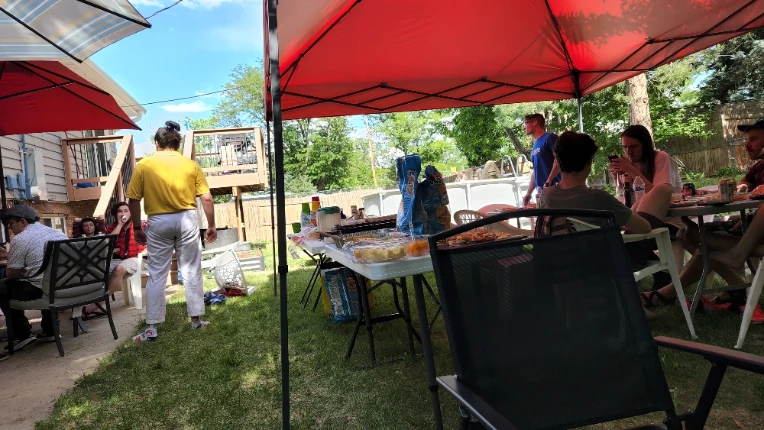
The unofficially official Pico Day party of 2022!


Early this year we learned there wasn’t going to be an in-person Pico Day meetup. After 2 years of events canceled due to Covid, a bunch of us, on Discord, got talking about making a meetup happen.


We had no intention of doing it on Pico Day, instead opting to do it during the summer when more people would be free to make it.


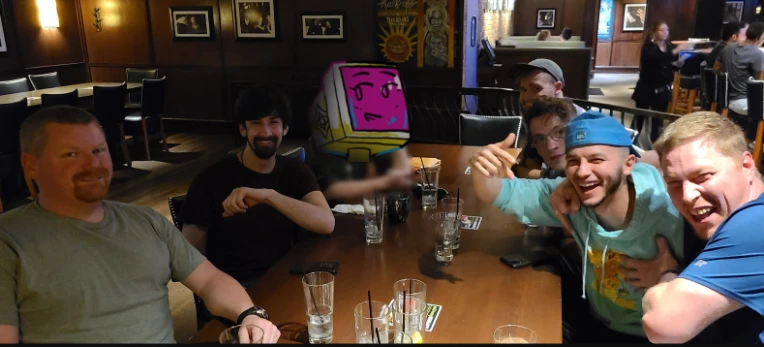
The plan was for a smaller, more casual meetup, centered around a BBQ/Party at my house. Obviously I wasn’t about to have an open invite for all of Newgrounds, so the guest list was mostly centered around people from my private Discord server, and the Newgrounds Podcast/NGPR gang.


The official date of the party, Jun 11, 2022!


As we were making these plans, the Flash Forward Game Jam was also going on. Due to a few ambitious games, and some late participants, Tom ended up pushing the date back further and further. He also had a bunch of other real-world stuff going on around the time.  


Between not wanting Pico Day to outshine the game jam, and possibly not even being able to hang out and enjoy the day (not to mention it’s his damn birthday, give the man a day off!), the decision was made to push Pico Day back.


After mulling around a few potential days, Tom just decided to make it the same day as my party. Considering my house is the next closest thing to an official Newgrounds office, the party became the OFFICIAL Pico Day party (even though the guest list wasn’t gonna be any bigger)!


Day 1: The Calm Before...

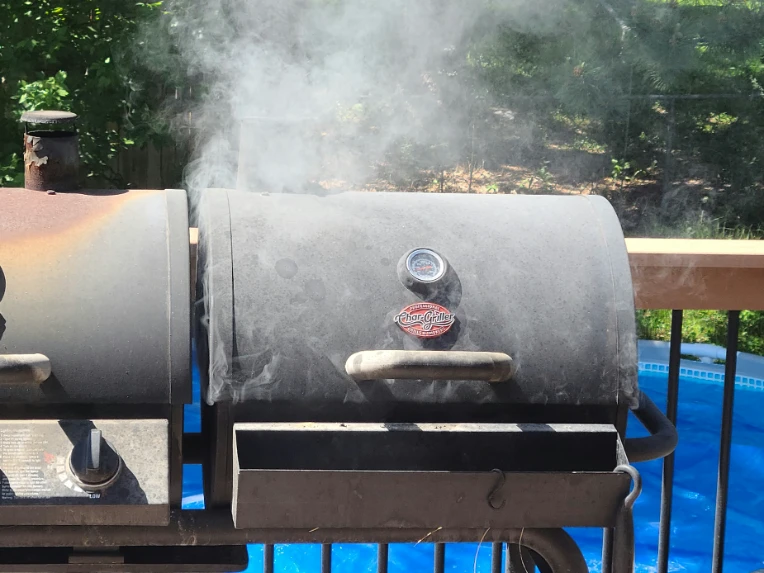
I started prepping for the party on Wednesday, the 8th. Did some supply shopping, and smoked the beef brisket we served at the party.


iu_669900_81981.webp


Later that night, my good pal, @Onic, showed up with a cooler full of fresh meats, soaking in bags of brine. A few beers and laughs were had, then we went to bed at a responsible hour.


@Xinxinix, @Buhlboy and @TheDyingSun had flown to Kansas City that day as well, and crashed with @jacob for the night. They went out to a concert and did NOT go to bed at a responsible hour.


@Jack and @Poptaffy did the crazy thing and got on a 2-day train to Denver.


iu_669901_81981.jpg


Day 2: The Gathering Storm


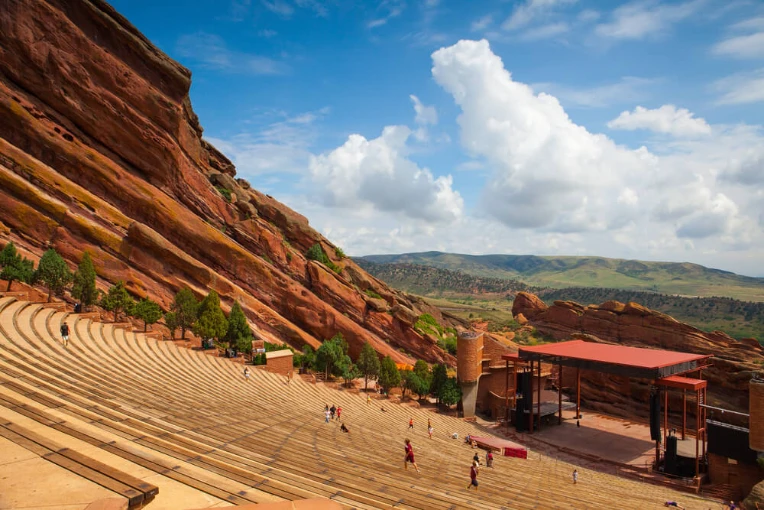
Thursday was mostly chill. Onic and I continued to hang out. We visited Red Rocks and walked up a lot of stairs, while the pork shoulder he brought was being smoked.  


iu_669902_81981.webp


Later we hit the Denver Museum of Nature and Science, and were very upset to find that the whole Dinosaur section was closed. Like for real? That is the only reason people even GO to that museum!


Well, at least we saw some rocks, and this ancient Egyptian work of art:


iu_669903_81981.jpg


Everyone else hit the road, or got on a plane at some point this day.


@Shal drove up with his fiancé, along with @DogL, AND their actual dog.

@heyopc, @droid & @maxxjamez all flew in to meet them at a group AirBNB


@Jacob and his gang got in mid-evening, checked in to their AirBNB, then met Onic, @MrsGoldfish, and myself for some drinks. @Bitbeak, who lives nearby, joined us shortly after.


iu_669904_81981.webp


We didn’t stay out too late, because Jacob had to pick up @Spadezer and @GoodL from the airport that night.


Day 3: Arcades n’ stuff


By Friday, pretty much everyone was in town.  


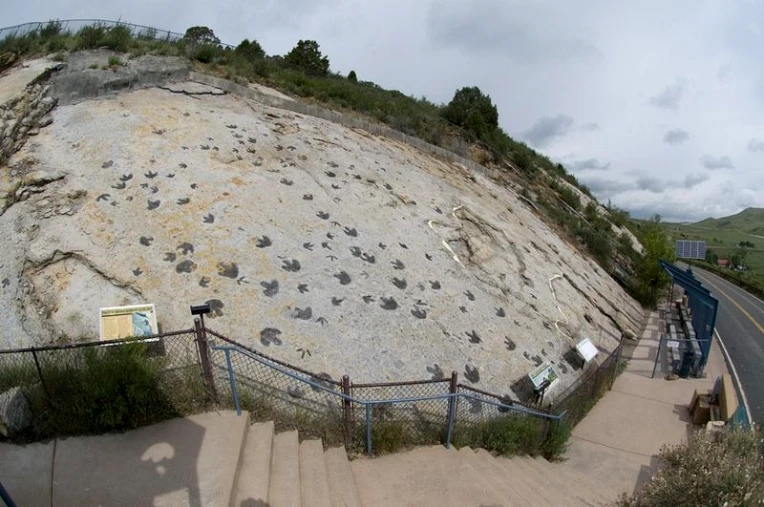
Onic and I started the day by hiking up Dinosaur Ridge, because we were gonna see SOME fucking fossils this week, even if it killed us!


iu_669905_81981.webp


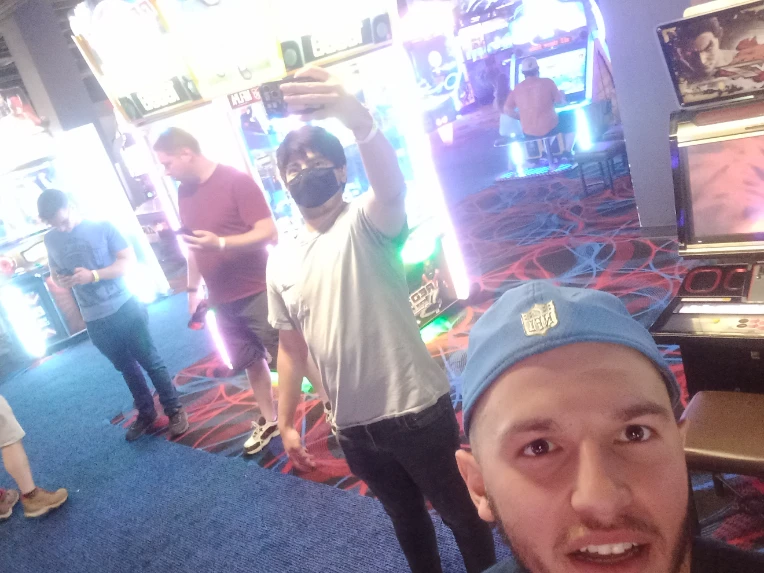
That afternoon, we all met at Round One and wasted a lot of money on very unsatisfying Japanese arcade games. Drank a few beers, played some pool, and got hungry.


iu_669907_81981.webp


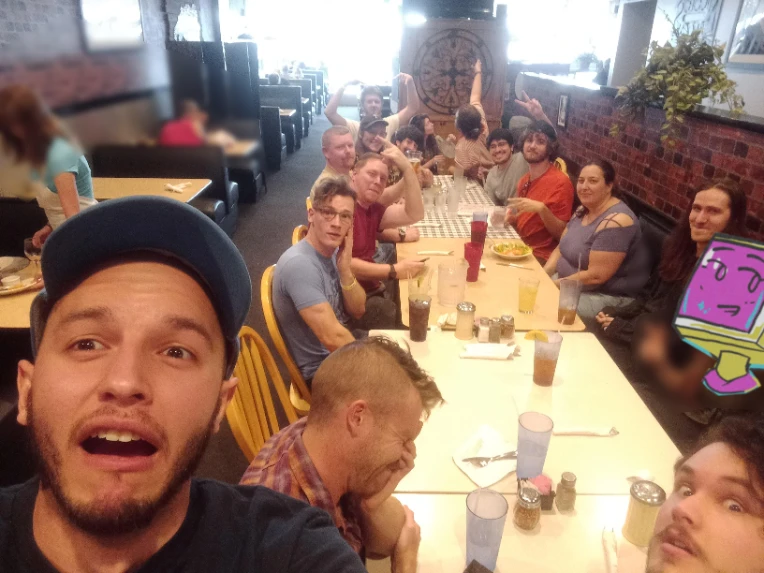
Then we descended like a swarm of locusts on a local pizza joint. The staff at Niccolo’s Pizza somehow handled all of those people, without any warning, like champs!


iu_669908_81981.webp


After dinner we split up, and a bunch of us went downtown. Half drove, half took the train, and it took WAY longer to find each other than it should have, but we DID IT!


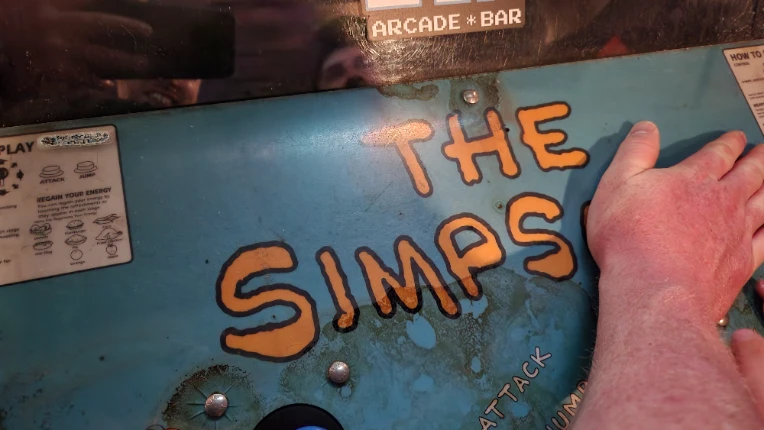
We hit another restaurant for a round of drinks, then proceeded to the 1-UP, a popular downtown barcade. Some of the other group met us there, and more games were played.


iu_669909_81981.webp


At some point, Bitbeak went and picked up @littlbox from the airport.


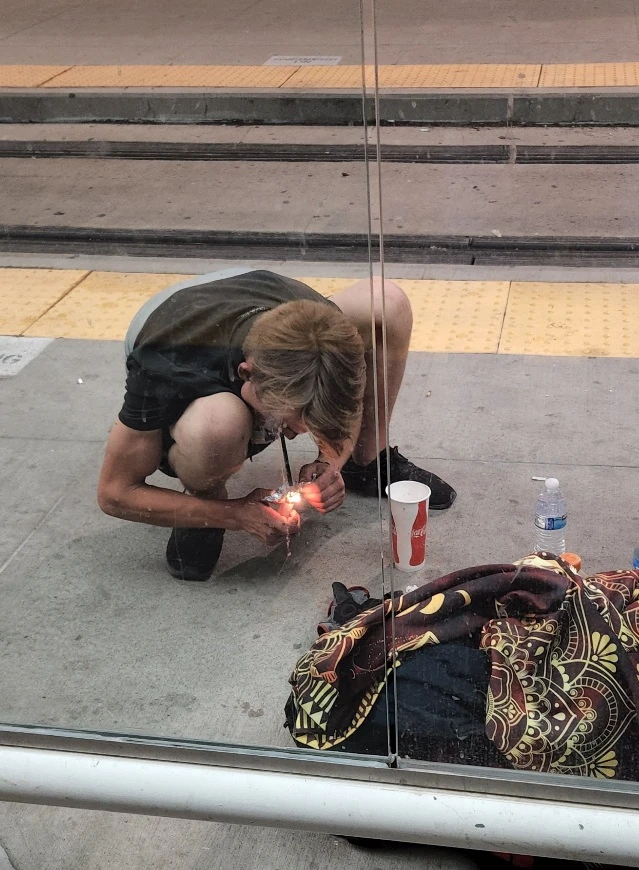
Onic, MrsGoldfish and I left around midnight to catch a train home. For whatever reason, THREE of the trains were canceled, so we were stuck at Union Station for like an hour and a half.


At least we got to watch the crackheads in their natural habitat...


iu_669910_81981.webp


Also, we heard the gunshots that apparently killed someone that night, so that was fun.

https://kdvr.com/news/local/1-killed-in-early-morning-shooting-near-coors-field/


Needless to say, we did not go to bed at a reasonable hour....


Day 4: The MEAT up


Onic and I started the day by picking up the last supplies for the party.  


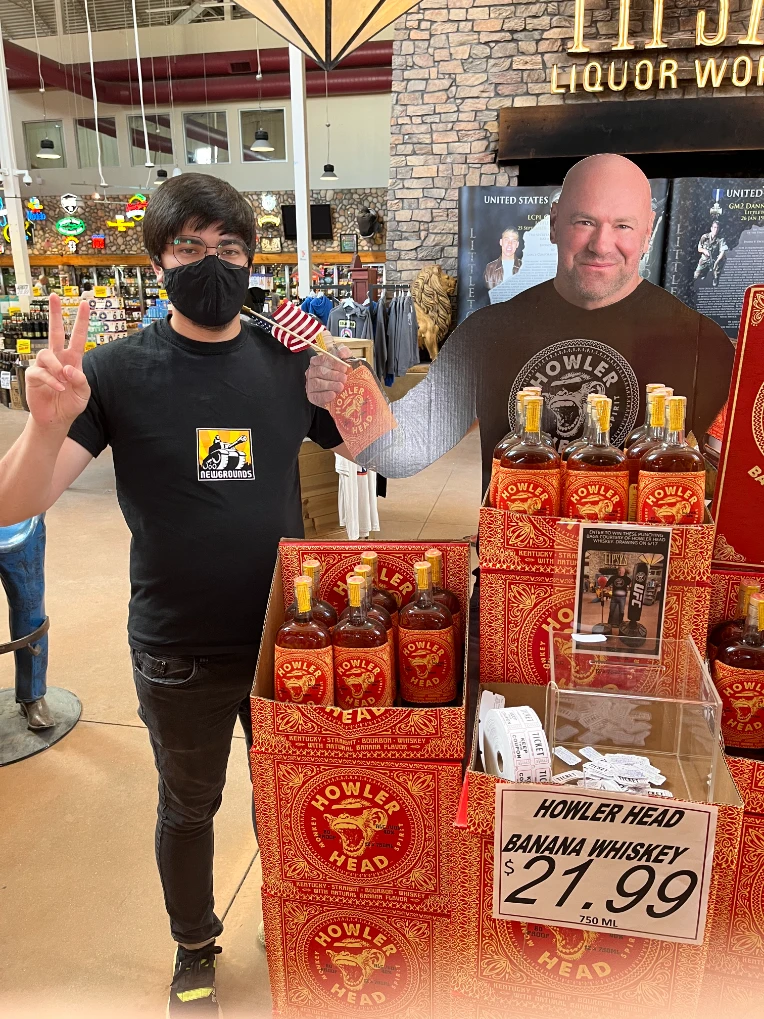
After that a bunch of us met at Tipsy’s Liquor World (the self-proclaimed, largest liquor store in the world) to get our libations for the BBQ.


iu_669912_81981.webp


When we got back, a few others were already hanging out at my place. Bitbeak was trying to figure out where to cook the bomb-ass jalepeno poppers he brought, so we got back just in time to help him out.


Also, @StaggerNight showed up at some point.


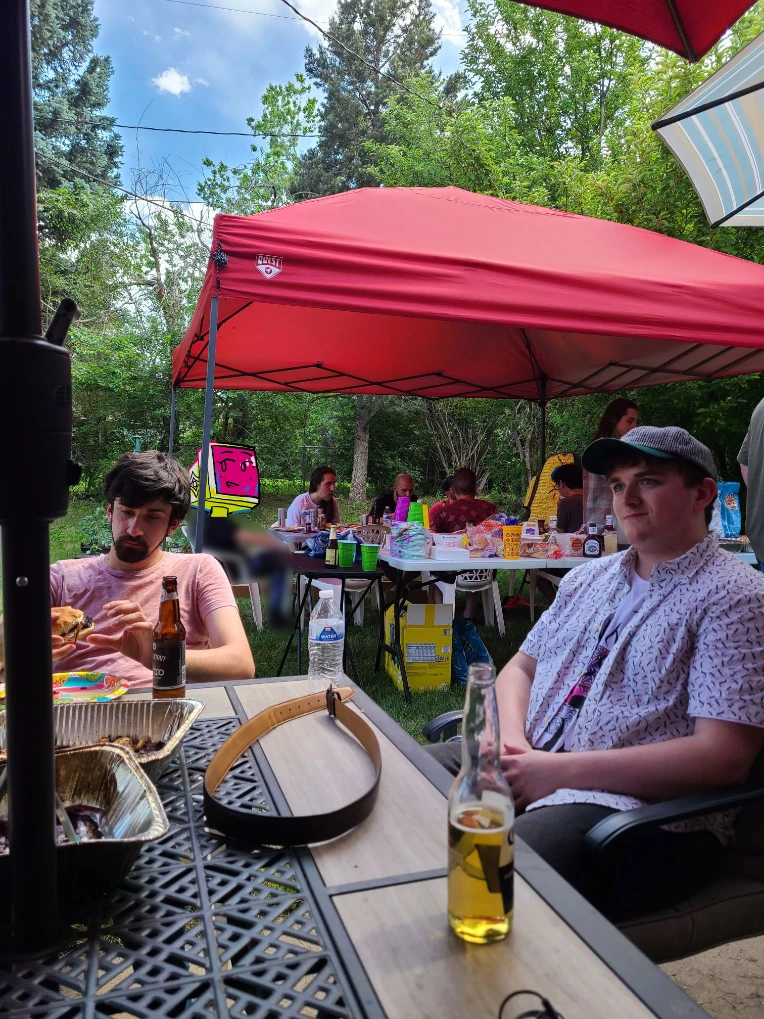
This party was like 9 different parties all in one.


We started with the initial “what are we doing here” awkward party.


Then we transitioned into the “holy shit it is hot out, let’s strip down to our underwear and get in the pool” party.


iu_669911_81981.webp


Then there was the “Look at all this food!” dinner party.


iu_669925_81981.webp


iu_669914_81981.webp


Then things took a weird turn, when the ice cream truck showed up. A dozen or so Newgrounders ran out to the truck, only to meet one of my neighbors, who was drunker than any of us. He started buying ice cream for EVERYONE at the party, dropping a lot of f-bombs in the process. It turns out his dad had just passed away, and he maybe hit the tequila a bit harder than he meant to.


iu_669915_81981.webp


Obviously, we invited him to the party, and he kinda fit right in.


This fed into the ‘content creation’ part of the party, where Maxx and Chris were filming footage for a bigfoot documentary (I vaguely remember standing in a tree for an interview), and a brand new community episode of A Couple of Crickets was recorded (I definitely remember singing Careless Whisper with littlbox).


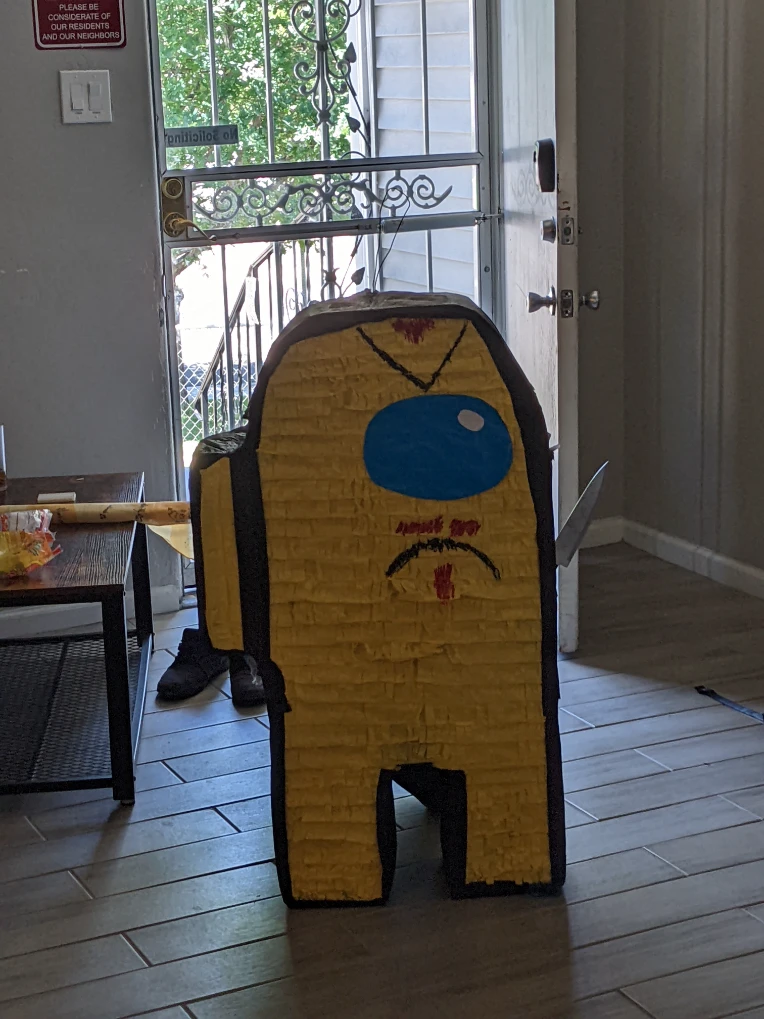
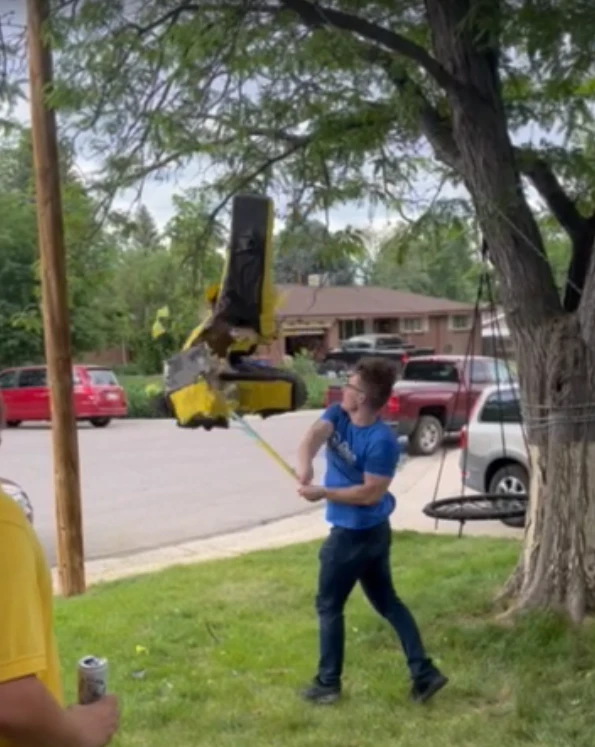
Then came the "Children's Birthday Party", where we beat up an Among Us piñata that looked a little bit like me....


iu_669916_81981.webp


iu_669917_81981.webp


After that, the party split up a bit, with half the gang going in the house to play JackBox, and the rest making a short trip to Goodwill to pop some tags.


Since the back yard was empty, littlbox, Onic, MrsGoldfish, my neighbor and I did a quick cleanup. (You wouldn’t believe how many Newgrounders don’t know how to use a trash can!)


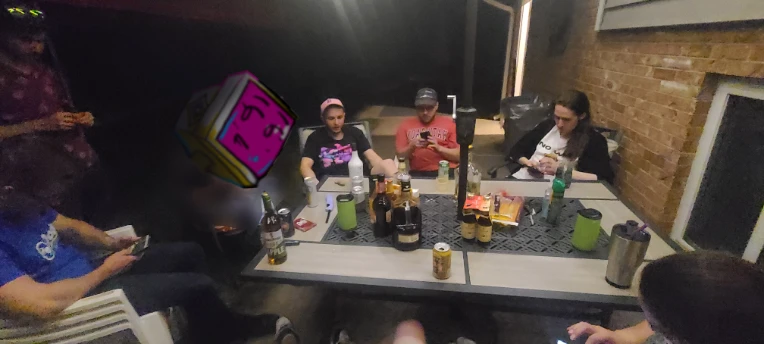
At some point everyone came back outside for the final “winding down, and making Alexa fart” party.


iu_669918_81981.webp


And then everyone went home with full bellies, and fond memories. And I had a ton of random alcohol left over.


Day 5: Kitty Dog


A bunch of people headed home early Saturday.


Others went for hikes.


iu_669963_81981.webp


TheDyingSun, Xinxinix, Spadezer, GoodL, littlbox, MrsGoldfish and myself went to Meow Wolf: Convergence Station.


This was the first time I had been there, and it was cool as hell. It’s like entering a handful of alien worlds, with a bunch of interactive exhibits, all created by this amazing artist collective.


That pretty much did it for me. I hung out with people at their AirBNB for a while before they went for a sunset hike. I said my goodbyes, went home, and almost passed out on the couch.


Had a great time... but I am getting too old for this shit!


iu_669919_81981.gif


Other Chronicles:


Check out this video from @heyopc


Tags:

36

Posted by PsychoGoldfish - April 27th, 2022


EDIT: Ruffle has its own preloading baked in now, yay! Nobody needs to enable this setting ever again.


----------------------------------------------------


I just pushed a little quality of life update for anyone with a large Flash Game that works with Ruffle.


Currently, Ruffle has to completely load and process swf files in their entirety. It also lacks any sort of native splash screen, or loading message, so the end user just sees a white screen that can make them think your games are broken.


The Ruffle team DOES hope to one-day get swf files loading in more of a stream, where the built-in Flash preloaders we all love will once again pop up right away. But until then, I have created a temporary solution.


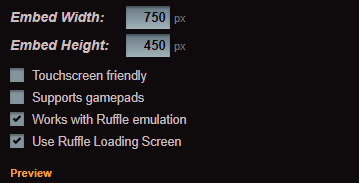
Simply make sure the Use Ruffle Loading Screen option is checked (should be by default in most cases) and you're good to go!


iu_620147_81981.png


If you don't enable the option, people will continue to see the white screen. If your games already load really fast, you probably shouldn't worry about any of this.


Tags:

29

Posted by PsychoGoldfish - December 31st, 2020


I want to start by saying, I don't usually do these New year write ups, but if there was ever a year worth remembering, 2020 is it.


A lot has happened in these 12 months. A global pandemic. The US election. Brexit. And after today, the death of Flash.


Despite all of that, I have to say, it's been a pretty decent year for me, despite so many low points.


I made a game!


I started this year the way I'm ending it (more on that later), by working on a game.


In January, we hosted the Phaser Game Jam, which was a good opportunity for me to work on a game I started in the Wick Editor jam. The theme for that jam was to make something you might find in a classic Flash game, so I went with a cannon/toss game. Unfortunately, it was too ambitious for Wick's capabiities at the time, but it ported perfectly to Phaser. While it isn't as fully-featured as I would have liked, I was still happy to publish Fish Cannon in mid February!


flash_748313_card.png?f1601007696


Some day I really want to go back and update the game and make my original vision for it a reality.


Working on NG, Feeling Burnt Out...


For the last 5 years, I have primarily been focused on updating NG pages to the mobile-friendly design. It's been a long grind, and full of super tedious updates to get all the smallest details feeling just right.


And while I am SUPER proud of all the work I have done, UX design is probably my least favorite thing to do (I'm, much happier doing the engineering side of things).


I can't even remember all the little things I worked on this year.


I know I started the year handling fixes for the project system update we rolled out at the end of Dec 2019. There's a fuzzy period, and then I updated the PM system to be mobile friendly.


More fuzz, and then I added some updates to the playlists, including the construction of a new video player, just in time to host a watchalong party for the Among Us Jam (more on that later).


Fuzz.. fuzz... and then I put more work and features into the new video player, officially implementing it on the portal view pages.


More recently I've been trying to work on the game API pages, but there's always something higher priority popping up it seems (which has been quite frustrating, since the API has been neglected WAY too long).


I partnered up with @liljim several times to do UX updates on a bunch of the cool updates he put out. We just recently updated the movie and game hubs to use a new icon format (oh yeah, I updated that too lol), and now you can actually watch videos on the movie hub directly! (There's still some work I have to do there so you can also vote and review those without leaving the page, so look for that at some point next year.)


Anyway, all this work (especially the UX stuff) had me feeling pretty burned out a few times this year. It's something I've been experiencing pretty much since we started implementing this design in 2015, and had actually resulted in me looking at NG as nothing but work, and kind of pulling away from being a part of the community.


The thing with UX design is 90% of the interaction you get about it is criticism. When you are engineering new things, people are just as excited that there's a new feature as they are critical about any flaws it has.


Now, I'm not saying criticism is a bad thing. We've taken a lot of that, and really made the site a lot more user-friendly thanks to the feedback. But when you see the community as being nothing BUT critical for years, it's not really an enjoyable place to be.


I'd become pretty withdrawn for several years, but that has changed a lot this year...


The Newgrounds Podcast


My re-engagement with the community actually started last year, when @Will (aka WillKMR aka Will Koomer) asked me to come on his GroundsPatrol podcast to talk about a post I made in the BBS (I think we had been discussing the future of the blam/scouting systems or something).


I had no fucking idea who this guy was, and couldn't fathom that a NG-oriented podcast was going to be all that interesting. It was surely just the same critical people I was tired of hearing from, or the lame crowd that has nothing better to contribute than memes. But, I decided to check out his previous episodes before I blew him off, and I'm so glad I did.


Will's interview with @Troisnyx was the catalyst for sucking me back into this community. The way they talked about NG and how important it is to them, and how it's affected them was just so touching to me. For the first time in years I actually felt like what I was doing was not only appreciated, but it actually MATTERED.


So, I got on with Will, and used the platform to kind of pour my heart out a little, and it was super cathartic.


I followed the podcast and eagerly anticipated each new installment. And because I was enjoying that so much, I gave the A Couple of Crickets (by @GoodL and @Littlbox) podcast a listen. That one was a different vibe, but had that warm 'hey hang out with us' vibe, and just re-affirmed that a lot of people appreciate a lot of the things I've done on the site.


I ended up installing Discord to catch the live Crickets shows, and chat with the GroundsPatrol crew and found myself actually hanging out and chatting with NG users on a much more regular basis.


Later that year, I was asked to be a part of a crossover podcast with all 3 of those guys, called Operation 2009, where we talked about NG 10 years ago and we had a blast, and it was nice to see that people were recognizing me as more than the guy you @ for tech support.


So, when 2020 rolled around, I had a handful of friends I'd made on Discord, and I had fallen in love with the whole idea of NG-themed podcasts.


In early 2020, both GroundsPatrol and A Couple of Crickets decided to end their respective shows, which really bummed me out, but Will promised it wasn't the end, and in February, after a bunch of trial and error, both Will and GoodL announced a new, joint podcast called The Newgrounds Podcast. I was pretty stoked for that.


After they had done a couple of episodes, Will approached me about being a guest host from time to time. Since I'm usually a pretty busy guy, I said I could do it on a part time basis, doing shows on a few weekdays here and there at most. I was supposed to just pop on a few times a year and maybe help interview some game devs or whatever.


When March rolled around... well... I suddenly had a lot more free time to jump on podcasts for some reason....


I went from being an occasional guest host, to being on like 17 episodes since March. I've had a blast hanging out with all of the other hosts, and catching up with old friends/peers like @photonstorm, @almightyhans, @Mike, @Rucklo, @entropicorder, @Glaiel-Gamer, @matt-likes-swords and @puffballsunited, as well as meeting new artists and devs like

the @scumhouse crew, @aemu & @fortebass from InnerSloth and the Milk Bar Lads; @milkbarjack, @majorwipeout, @milkyace and @stradomyre, among others.


The COVID Era


So, 2020 had started pretty positively, and I had a lot of cool things going for me. I was getting back into the NG community, I was gonna hang out on the podcast sometimes, I got to work on a game, and things were looking up.


My family had plans to travel to Canada over the summer and visit family and hit Canada's Wonderland. We had bought season passes for our local theme/water park, Elitch Gardens, and we were even talking about a road trip for spring break.


The first shitty thing to happen was my grandma, who had been battling COPD for a while, was hospitalized (up in Canada), and things didn't look good. I booked a flight so I could go see her, and literally the day before I would have left, the first wave of COVID was hitting.


We decided it was a terrible idea to risk bringing a respiratory disease to someone with a terminal lug disease, and I had to cancel that trip. It's a good thing I did too, because the US/Canada border got closed before I would have come back.


My grandma did recover from that hospitalization enough that I was able to video chat with her on Facebook Messenger a few times, before she passed away in August. I was gutted that I couldn't be with the family or attend the funeral, but grateful we have the technology that enabled me to visit with her virtually those last few times.


iu_217831_81981.jpg


When the US started doing lockdowns and quarantines, I found myself with a lot more free time, and a lot of boredom. That's when I started Party Games & Chill (that's next), and started doing more projects around the house.


Since we wouldn't be going to water parks or anything this year, we got an above ground pool just in time for my daughter's quarantine birthday party.


We spent a ton of time going on LONG walks and bike rides around the neighborhood and various parks. Since the gyms were closing, we spent a day cleaning the shit out of our garage and making it into a home gym. I'm still using that now, even though it's cold as balls.


With covid wrecking so man of our traditions, we decided to roll with it a few times. Instead of Turkey for thanksgiving and xmas, we spent all day on TG making a massive Italian feast from scratch. Xmas we went the other route and ordered a ton of Chinese food. Both meals were pretty epic.


Party Games & Chill


I love going out and socializing, and decided I was going to create some kind of environment where people could hang out and have fun. I'd always loved having game nights at my place, and we'd usually play card games or bust out a JackBox Party Pack on the TV. I figured the JackBox games would translate really well to a Discord group, since anyone could join in without ever having to buy or install anything.


So, I created the Party Games & Chill server. I spammed the link all over other Discord servers, on Facebook and Twitter, and on NG itself. I wasn't sure how many people would be interested, or what types of people would show up, so I was pleasantly surprised at how many fun/talented people popped in right away.


I can't even remember who has all come and gone from the group, but I know I have drawn a LOT of dicks with the likes of @xinxinix, @albegian, @nickconter, @jacob, @spadezer, @rgpanims, @realmrsnuggles, @lobstermango, @shitonastick, @oddlem, @will, @goodl, @littlbox, @splatterdash, @holden-liu, @deluca2400, @ninjamuffin99, @voicesbycorey, @octong, @johnnyguy, @bigtexastony, @jatmoz, @buhlboy, @brandybuizel, @bobbyjenkins, @slightly-crazy-dude, @thedyingsun, @enzocordeiro42, @luckodastars, @bluryach, @snailpirate, @vryskull, @zj, @nicksenny, and a few people who's NG names I do not know...


We have a core group that's grown to be really tight, but we're always happy to see new people pop in and hang out with us. A lot of these people I had never met before, and now it feels like we've been friends forever. Others have been friends for years, but had drifted away from NG, and got sucked back in. Not only has everyone there helped pass the boredom of COVID, but they have been pretty inspirational/motivational for me. I've collaborated on a few projects with the crew, and have simply been rediscovering how much I like to make art.


Collaborations


Earlier this summer, a bunch of us were joking around on the old GRNDSBreaking Discord (which has merged into the Newgrounds Podcast discord), about making a boy-band style song called "I'm a Simp for You". I forget who exactly was there, but I know @Fro and @voicesbycorey were part of it. Anyway, a few weeks later Corey asks me if I wanted to make the song for real as part of the Voice Acting Collab, along with Fro. So we bullied @RealMrSnuggles into making the music, and got a few other guys together and actually made a... song?


I also ended up making a cartoon for the NG Among Us Jam (more on that later), recruiting a bunch of people from Party Games & Chill to do all the voice acting and sound production. The animation was super cheap, but the VAs and MrSnuggles' audio production made it come out really great. The theme for the Jam was "The Purple Impostor".


Our group had been playing the game for a while, and I was notorious for making my name a color that didn't match my space suit, so I used that as the basis for the whole thing.


And, I even recorded some lines for @RGPAnims to use in an upcoming xmas collab, so that kinda counts as a 2020 collaboration.


Summer Block Party


This could have been filed under The Newgrounds Podcast, but it was such a huge event I think it deserves it's own spot on my list.


What started out as just a simple idea of inviting members of the NGP audience to hang out and maybe stream some art and stream some NG videos and music, without a lot of major fanfare, turned into what was, arguably, the biggest NG event of the year (SUCK IT PICO DAY!).


We invited @Xinxinix to help plan the artist side of the party, because of all the great work he had been doing with his Art Talks podcast, and when he saw we were thinking of putting together a halfassed event in like 1 week, he was all "Hell yeah, I'm in, but we need more time to set things up, omg *Eddie Murphy laugh*".


So with more time, we started concocting ideas like having a giveaway... but then we wanted to have BIG prizes, so we decided we should do a raffle to help cover costs. We recruited volunteers to run some party game rooms, got some DJs to play full sets, all while Xin was lining up groups of dope-ass artists. And we got really aggressive with promoting the event, to the point we decided we needed a big ticket item for the raffle; a Nintendo Switch.


You guys have no idea how much stress was involved (mostly by Xin and Will lol), getting things set up. For my part, I built a whole webpage for selling the raffle tickets and handling the random drawings in just a couple of days, and even made it mostly drunk proof (which Will laughed about until he almost fucked up using it a few times... then he truly appreciated it).


The party itself was amazing. Hundreds of NG users showed up to watch their favorite artists stream, to catch the DJS and play the games, or just hang out and mingle. It was so much fun, and everyone was super excited for the raffle results. We gave away so much stuff, thanks to generous prize donations from @luis, @wavetro, @ninjamuffin99, @brandybuizel, @TheDyingSun, AntonioMabs and @TomFulp, plus all the ticket sales and cash donations from the NG community.


It was probably the closest you could get to a Newgrounds Convention without having to leave your house. And apparently we have to go through all that stress again next year, so look forward to that...


Among Us


We started playing a LOT of Among Us in Party Games & Chill late summer, early fall. The game was exploding everywhere, and it was cool to see the InnerSloth team seeing so much success.


Eventually, Tom announced that we were going to do an Among Us Jam (I mentioned my submission earlier), and we were able to get the whole InnerSloth team on The Newgrounds Podcast right after the jam deadline.


To help hype it all up, we ran Among Us party rooms on the NGP Discord all the way through Halloween. EVERYTHING was Among Us for like 2 straight months.


On the Jam's deadline, I hosted a watch-along party on the NGP Discord so everyone could see all the submissions (using the updated playlist system I had just finished at the time!). It was over 5 HOURS LONG, but there were so many great submissions. So many people showed up that the Discord stream actually got full and I had to dust off my Twitch account to stream.


Shortly after that we got to hang out with all 3 InnerSloth devs on the podcast, for one of my favorite interviews of the year.


Octobit


I had tried doing Inktober a few times and could never find the time or drive to commit to making 31 ink drawings in a single month. This year, I decided to give Octobit a try instead, focusing on pixel art. Rather than letting it become overwhelming, I decided to force limitations on myself. I was only going to do small art with a limited palette, that could fit in a single image collage.


This was a very fun project and forced me to get some long-stagnant creative juices flowing. There's a good chance I'll be doing it again next year.


The Death of Flash


One other thing I put a fair bit of work into was getting Ruffle working on NG before the plugin officially dies today. There was a lot of small tweaks and updates to get things working well and secure, plus all the pestering of Mike for help or reporting issues.


But now that Ruffle is working well for a lot of older flash, NG is hosting a Flash Jam to give Flash one last hurrah. And this is where I'm ending my year. Using an old copy of Flash 8, and an even older @MindChamber, I am balls deep in building a new game. It's the first Flash game I've coded in like 13 years or so, and it's been a real trip getting re-acquainted with ActionScript 2.0.


The game is going to be kind of a hybrid of Alloy Arena and Super Crate Box. Basically the melee combat of Alloy, but the arcade style of SCB. I really hope you guys like it when it's finished, I can't wait to share it with you all in 2021, and also give the finger to all the Flash haters by releasing a working Flash game after the plugin is dead.


Well, that's about all I got. I'm sure other stuff happened, but I've been writing for way too long already, and I have to get ready to get drunk as hell tonight. So with that...


HAPPY NEW YEAR, NG!!!!!


61

Posted by PsychoGoldfish - August 10th, 2020


T H E N E W G R O U N D S P O D C A S T :

Big Summer Block Party Games

Volunteer Guide


On Aug 29, starting at 3:30, we will be hosting a remote block party on our Discord server. Part of that party will involve multiple voice channels streaming party games.


We are currently looking for users who are willing to host party game streams.  


We are looking for people who own games that other players can join without having to buy or download anything. Games like:


  • The Jackbox Party Pack (any pack)
  • Use Your Words


In addition to those, you can also run any other web-based party game that’s free, like:


You do not have to play the games, or even hang out in the channel, as long as you are able to keep the game stream going.


Ideally, you would be available to check in on your game regularly to make sure it is running smoothly. You may also need to manually restart the game if the “VIP” users aren’t allowing new players a chance to join. I would recommend using an alt Discord account to host these games so you can use your main to hop around the party.


Game rooms will have a reasonable user limit (between 12 and 20) to prevent too many people from talking over one another.


We will be choosing volunteers based on which games they have, and what times they are available (the signup form is broken into 1 hour blocks for availability).


If you are interested in volunteering, please fill out the signup form (use your NG username so I can contact you). Approval and a final schedule will be provided by @PsychoGoldfish as soon as possible.


For more info on the party, check out the official announcement post. Join our Discord while you're at it!


9

Posted by PsychoGoldfish - February 17th, 2020


I've been playing all the PhaserJam2020 games, and noticed pretty much all of the mobile-friendly ones have no sound on iOS, so I thought I'd share the hack I came up with to make it work in Fish Canon.


For anything HTML5 based, most modern browsers won't let a page play sounds unless you start at least one sound has been started in a user action event, like a key press, mouse click or screen touch.


Phaser tries to start sound when input events are fired, but for some reason it just doesn't seem to work on iOS at the moment.


To get around that, I wrote this little method:


var safariSoundHack = (()=>{

	let safariAudiotag = document.createElement('audio');
	document.body.appendChild(safariAudiotag);
	safariAudiotag.src = 'data:audio/x-wav;base64,UklGRooWAABXQVZFZm10IBAAAAABAAEAIlYAAESsAAACABAAZGF0YWYWAAAAAAAAAAAAAAAAAAAAAAAAAAAAAAAAAAAAAAAAAAAAAAAAAAAAAAAAAAAAAAAAAAAAAAAAAAAAAAAAAAAAAAAAAAAAAAAAAAAAAAAAAAAAAAAAAAAAAAAAAAAAAAAAAAAAAAAAAAAAAAAAAAAAAAAAAAAAAAAAAAAAAAAAAAAAAAAAAAAAAAAAAAAAAAAAAAAAAAAAAAAAAAAAAAAAAAAAAAAAAAAAAAAAAAAAAAAAAAAAAAAAAAAAAAAAAAAAAAAAAAAAAAAAAAAAAAAAAAAAAAAAAAAAAAAAAAAAAAAAAAAAAAAAAAAAAAAAAAAAAAAAAAAAAAAAAAAAAAAAAAAAAAAAAAAAAAAAAAAAAAAAAAAAAAAAAAAAAAAAAAAAAAAAAAAAAAAAAAAAAAAAAAAAAAAAAAAAAAAAAAAAAAAAAAAAAAAAAAAAAAAAAAAAAAAAAAAAAAAAAAAAAAAAAAAAAAAAAAAAAAAAAAAAAAAAAAAAAAAAAAAAAAAAAAAAAAAAAAAAAAAAAAAAAAAAAAAAAAAAAAAAAAAAAAAAAAAAAAAAAAAAAAAAAAAAAAAAAAAAAAAAAAAAAAAAAAAAAAAAAAAAAAAAAAAAAAAAAAAAAAAAAAAAAAAAAAAAAAAAAAAAAAAAAAAAAAAAAAAAAAAAAAAAAAAAAAAAAAAAAAAAAAAAAAAAAAAAAAAAAAAAAAAAAAAAAAAAAAAAAAAAAAAAAAAAAAAAAAAAAAAAAAAAAAAAAAAAAAAAAAAAAAAAAAAAAAAAAAAAAAAAAAAAAAAAAAAAAAAAAAAAAAAAAAAAAAAAAAAAAAAAAAAAAAAAAAAAAAAAAAAAAAAAAAAAAAAAAAAAAAAAAAAAAAAAAAAAAAAAAAAAAAAAAAAAAAAAAAAAAAAAAAAAAAAAAAAAAAAAAAAAAAAAAAAAAAAAAAAAAAAAAAAAAAAAAAAAAAAAAAAAAAAAAAAAAAAAAAAAAAAAAAAAAAAAAAAAAAAAAAAAAAAAAAAAAAAAAAAAAAAAAAAAAAAAAAAAAAAAAAAAAAAAAAAAAAAAAAAAAAAAAAAAAAAAAAAAAAAAAAAAAAAAAAAAAAAAAAAAAAAAAAAAAAAAAAAAAAAAAAAAAAAAAAAAAAAAAAAAAAAAAAAAAAAAAAAAAAAAAAAAAAAAAAAAAAAAAAAAAAAAAAAAAAAAAAAAAAAAAAAAAAAAAAAAAAAAAAAAAAAAAAAAAAAAAAAAAAAAAAAAAAAAAAAAAAAAAAAAAAAAAAAAAAAAAAAAAAAAAAAAAAAAAAAAAAAAAAAAAAAAAAAAAAAAAAAAAAAAAAAAAAAAAAAAAAAAAAAAAAAAAAAAAAAAAAAAAAAAAAAAAAAAAAAAAAAAAAAAAAAAAAAAAAAAAAAAAAAAAAAAAAAAAAAAAAAAAAAAAAAAAAAAAAAAAAAAAAAAAAAAAAAAAAAAAAAAAAAAAAAAAAAAAAAAAAAAAAAAAAAAAAAAAAAAAAAAAAAAAAAAAAAAAAAAAAAAAAAAAAAAAAAAAAAAAAAAAAAAAAAAAAAAAAAAAAAAAAAAAAAAAAAAAAAAAAAAAAAAAAAAAAAAAAAAAAAAAAAAAAAAAAAAAAAAAAAAAAAAAAAAAAAAAAAAAAAAAAAAAAAAAAAAAAAAAAAAAAAAAAAAAAAAAAAAAAAAAAAAAAAAAAAAAAAAAAAAAAAAAAAAAAAAAAAAAAAAAAAAAAAAAAAAAAAAAAAAAAAAAAAAAAAAAAAAAAAAAAAAAAAAAAAAAAAAAAAAAAAAAAAAAAAAAAAAAAAAAAAAAAAAAAAAAAAAAAAAAAAAAAAAAAAAAAAAAAAAAAAAAAAAAAAAAAAAAAAAAAAAAAAAAAAAAAAAAAAAAAAAAAAAAAAAAAAAAAAAAAAAAAAAAAAAAAAAAAAAAAAAAAAAAAAAAAAAAAAAAAAAAAAAAAAAAAAAAAAAAAAAAAAAAAAAAAAAAAAAAAAAAAAAAAAAAAAAAAAAAAAAAAAAAAAAAAAAAAAAAAAAAAAAAAAAAAAAAAAAAAAAAAAAAAAAAAAAAAAAAAAAAAAAAAAAAAAAAAAAAAAAAAAAAAAAAAAAAAAAAAAAAAAAAAAAAAAAAAAAAAAAAAAAAAAAAAAAAAAAAAAAAAAAAAAAAAAAAAAAAAAAAAAAAAAAAAAAAAAAAAAAAAAAAAAAAAAAAAAAAAAAAAAAAAAAAAAAAAAAAAAAAAAAAAAAAAAAAAAAAAAAAAAAAAAAAAAAAAAAAAAAAAAAAAAAAAAAAAAAAAAAAAAAAAAAAAAAAAAAAAAAAAAAAAAAAAAAAAAAAAAAAAAAAAAAAAAAAAAAAAAAAAAAAAAAAAAAAAAAAAAAAAAAAAAAAAAAAAAAAAAAAAAAAAAAAAAAAAAAAAAAAAAAAAAAAAAAAAAAAAAAAAAAAAAAAAAAAAAAAAAAAAAAAAAAAAAAAAAAAAAAAAAAAAAAAAAAAAAAAAAAAAAAAAAAAAAAAAAAAAAAAAAAAAAAAAAAAAAAAAAAAAAAAAAAAAAAAAAAAAAAAAAAAAAAAAAAAAAAAAAAAAAAAAAAAAAAAAAAAAAAAAAAAAAAAAAAAAAAAAAAAAAAAAAAAAAAAAAAAAAAAAAAAAAAAAAAAAAAAAAAAAAAAAAAAAAAAAAAAAAAAAAAAAAAAAAAAAAAAAAAAAAAAAAAAAAAAAAAAAAAAAAAAAAAAAAAAAAAAAAAAAAAAAAAAAAAAAAAAAAAAAAAAAAAAAAAAAAAAAAAAAAAAAAAAAAAAAAAAAAAAAAAAAAAAAAAAAAAAAAAAAAAAAAAAAAAAAAAAAAAAAAAAAAAAAAAAAAAAAAAAAAAAAAAAAAAAAAAAAAAAAAAAAAAAAAAAAAAAAAAAAAAAAAAAAAAAAAAAAAAAAAAAAAAAAAAAAAAAAAAAAAAAAAAAAAAAAAAAAAAAAAAAAAAAAAAAAAAAAAAAAAAAAAAAAAAAAAAAAAAAAAAAAAAAAAAAAAAAAAAAAAAAAAAAAAAAAAAAAAAAAAAAAAAAAAAAAAAAAAAAAAAAAAAAAAAAAAAAAAAAAAAAAAAAAAAAAAAAAAAAAAAAAAAAAAAAAAAAAAAAAAAAAAAAAAAAAAAAAAAAAAAAAAAAAAAAAAAAAAAAAAAAAAAAAAAAAAAAAAAAAAAAAAAAAAAAAAAAAAAAAAAAAAAAAAAAAAAAAAAAAAAAAAAAAAAAAAAAAAAAAAAAAAAAAAAAAAAAAAAAAAAAAAAAAAAAAAAAAAAAAAAAAAAAAAAAAAAAAAAAAAAAAAAAAAAAAAAAAAAAAAAAAAAAAAAAAAAAAAAAAAAAAAAAAAAAAAAAAAAAAAAAAAAAAAAAAAAAAAAAAAAAAAAAAAAAAAAAAAAAAAAAAAAAAAAAAAAAAAAAAAAAAAAAAAAAAAAAAAAAAAAAAAAAAAAAAAAAAAAAAAAAAAAAAAAAAAAAAAAAAAAAAAAAAAAAAAAAAAAAAAAAAAAAAAAAAAAAAAAAAAAAAAAAAAAAAAAAAAAAAAAAAAAAAAAAAAAAAAAAAAAAAAAAAAAAAAAAAAAAAAAAAAAAAAAAAAAAAAAAAAAAAAAAAAAAAAAAAAAAAAAAAAAAAAAAAAAAAAAAAAAAAAAAAAAAAAAAAAAAAAAAAAAAAAAAAAAAAAAAAAAAAAAAAAAAAAAAAAAAAAAAAAAAAAAAAAAAAAAAAAAAAAAAAAAAAAAAAAAAAAAAAAAAAAAAAAAAAAAAAAAAAAAAAAAAAAAAAAAAAAAAAAAAAAAAAAAAAAAAAAAAAAAAAAAAAAAAAAAAAAAAAAAAAAAAAAAAAAAAAAAAAAAAAAAAAAAAAAAAAAAAAAAAAAAAAAAAAAAAAAAAAAAAAAAAAAAAAAAAAAAAAAAAAAAAAAAAAAAAAAAAAAAAAAAAAAAAAAAAAAAAAAAAAAAAAAAAAAAAAAAAAAAAAAAAAAAAAAAAAAAAAAAAAAAAAAAAAAAAAAAAAAAAAAAAAAAAAAAAAAAAAAAAAAAAAAAAAAAAAAAAAAAAAAAAAAAAAAAAAAAAAAAAAAAAAAAAAAAAAAAAAAAAAAAAAAAAAAAAAAAAAAAAAAAAAAAAAAAAAAAAAAAAAAAAAAAAAAAAAAAAAAAAAAAAAAAAAAAAAAAAAAAAAAAAAAAAAAAAAAAAAAAAAAAAAAAAAAAAAAAAAAAAAAAAAAAAAAAAAAAAAAAAAAAAAAAAAAAAAAAAAAAAAAAAAAAAAAAAAAAAAAAAAAAAAAAAAAAAAAAAAAAAAAAAAAAAAAAAAAAAAAAAAAAAAAAAAAAAAAAAAAAAAAAAAAAAAAAAAAAAAAAAAAAAAAAAAAAAAAAAAAAAAAAAAAAAAAAAAAAAAAAAAAAAAAAAAAAAAAAAAAAAAAAAAAAAAAAAAAAAAAAAAAAAAAAAAAAAAAAAAAAAAAAAAAAAAAAAAAAAAAAAAAAAAAAAAAAAAAAAAAAAAAAAAAAAAAAAAAAAAAAAAAAAAAAAAAAAAAAAAAAAAAAAAAAAAAAAAAAAAAAAAAAAAAAAAAAAAAAAAAAAAAAAAAAAAAAAAAAAAAAAAAAAAAAAAAAAAAAAAAAAAAAAAAAAAAAAAAAAAAAAAAAAAAAAAAAAAAAAAAAAAAAAAAAAAAAAAAAAAAAAAAAAAAAAAAAAAAAAAAAAAAAAAAAAAAAAAAAAAAAAAAAAAAAAAAAAAAAAAAAAAAAAAAAAAAAAAAAAAAAAAAAAAAAAAAAAAAAAAAAAAAAAAAAAAAAAAAAAAAAAAAAAAAAAAAAAAAAAAAAAAAAAAAAAAAAAAAAAAAAAAAAAAAAAAAAAAAAAAAAAAAAAAAAAAAAAAAAAAAAAAAAAAAAAAAAAAAAAAAAAAAAAAAAAAAAAAAAAAAAAAAAAAAAAAAAAAAAAAAAAAAAAAAAAAAAAAAAAAAAAAAAAAAAAAAAAAAAAAAAAAAAAAAAAAAAAAAAAAAAAAAAAAAAAAAAAAAAAAAAAAAAAAAAAAAAAAAAAAAAAAAAAAAAAAAAAAAAAAAAAAAAAAAAAAAAAAAAAAAAAAAAAAAAAAAAAAAAAAAAAAAAAAAAAAAAAAAAAAAAAAAAAAAAAAAAAAAAAAAAAAAAAAAAAAAAAAAAAAAAAAAAAAAAAAAAAAAAAAAAAAAAAAAAAAAAAAAAAAAAAAAAAAAAAAAAAAAAAAAAAAAAAAAAAAAAAAAAAAAAAAAAAAAAAAAAAAAAAAAAAAAAAAAAAAAAAAAAAAAAAAAAAAAAAAAAAAAAAAAAAAAAAAAAAAAAAAAAAAAAAAAAAAAAAAAAAAAAAAAAAAAAAAAAAAAAAAAAAAAAAAAAAAAAAAAAAAAAAAAAAAAAAAAAAAAAAAAAAAAAAAAAAAAAAAAAAAAAAAAAAAAAAAAAAAAAAAAAAAAAAAAAAAAAAAAAAAAAAAAAAAAAAAAAAAAAAAAAAAAAAAAAAAAAAAAAAAAAAAAAAAAAAAAAAAAAAAAAAAAAAAAAAAAAAAAAAAAAAAAAAAAAAAAAAAAAAAAAAAAAAAAAAAAAAAAAAAAAAAAAAAAAAAAAAAAAAAAAAAAAAAAAAAAAAAAAAAAAAAAAAAAAAAAAAAAAAAAAAAAAAAAAAAAAAAAAAAAAAAAAAAAAAAAAAAAAAAAAAAAAAAAAAAAAAAAAAAAAAAAAAAAAAAAAAAAAAAAAAAAAAAAAAAAAAAAAAAAAAAAAAAAAAAAAAAAAAAAAAAAAAAAAAAAAAAAAAAAAAAAAAAAAAAAAAAAAAAAAAAAAAAAAAAAAAAAAAAAAAAAAAAAAAAAAAAAAAAAAAAAAAAAAAAAAAAAAAAAAAAAAAAAAAAAAAAAAAAAAAAAAAAAAAAAAAAAAAAAAAAAAAAAAAAAAAAAAAAAAAAAAAAAAAAAAAAAAAAAAAAAAAAAAAAAAAAAAAAAAAAAAAAAAAAAAAAAAAAAAAAAAAAAAAAAAAAAAAAAAAAAAAAAAAAAAAAAAAAAAAAAAAAAAAAAAAAAAAAAAAAAAAAAAAAAAAAAAAAAAAAAAAAAAAAAAAAAAAAAAAAAAAAAAAAAAAAAAAAAAAAAAAAAAAAAAAAAAAAAAAAAAAAAAAAAAAAAAAAAAAAAAAAAAAAAAAAAAAAAAAAAAAAAAAAAAAAAAAAAAAAAAAAAAAAAAAAAAAAAAAAAAAAAAAAAAAAAAAAAAAAAAAAAAAAAAAAAAAAAAAAAAAAAAAAAAAAAAAAAAAAAAAAAAAAAAAAAAAAAAAAAAAAAAAAAAAAAAAAAAAAAAAAAAAAAAAAAAAAAAAAAAAAAAAAAAAAAAAAAAAAAAAAAAAAAAAAAAAAAAAAAAAAAAAAAAAAAAAAAAAAAAAAAAAAAAAAAAAAAAAAAAAAAAAAAAAAAAAAAAAAAAAAAAAAAAAAAAAAAAAAAAAAAAAAAAAAAAAAAAAAAAAAAAAAAAAAAAAAAAAAAAAAAAAAAAAAAAAAAAAAAAAAAAAAAAAAAAAAAAAAAAAAAAAAAAAAAAAAAAAAAAAAAAAAAAAAAAAAAAAAAAAAAAAAAAAAAAAAAAAAAAAAAAAAAAAAAAAAAAAAAAAAAAAAAAAAAAAAAAAAAAAAAAAAAAAAAAAAAAAAAAAAAAAAAAAAAAAAAAAAAAAAAAAAAAAAAAAAAAAAAAAAAAAAAAAAAAAAAAAAAAAAAAAAAAAAAAAAAAAAAAAAAAAAAAAAAAAAAAAAAAAAAAAAAAAAAAAAAAAAAAAAAAAAAAAAAAAAAAAAAAAAAAAAAAAAAAAAAAAAAAAAAAAAAAAAAAAAAAAAAAAAAAAAAAAAAAAAAAAAAAAAAAAAAAAAAAAAAAAAAAAAAAAAAAAAAAAAAAAAAAAAAAAAAAAAAAAAAAAAAAAAAAAAAAAAAAAAAAAAAAAAAAAAAAAAAAAAAAAAAAAAAAAAAAAAAAAAAAAAAAAAAAAAAAAAAAAAAAAAAAAAAAAAAAAAAAAAAAAAAAAAAAAAAAAAAAAAAAAAAAAAAAAAAAAAAAAAAAAAAAAAAAAAAAAAAAAAAAAAAAAAAAAAAAAAAAAAAAAAAAAAAAAAAAAAAAAAAAAAAAAAAAAAAAAAAAAAAAAAAAAAAAAAAAAAAAAAAAAAAAAAAAAAAAAAAAAAAAAAAAAAAAAAAAAAAAAAAAAAAAAAAAAAAAAAAAAAAAAAAAAAAAAAAAAAAAAAAAAAAAAAAAAAAAAAAAAAAAAAAAAAAAAAAAAAAAAAAAAAAAAAAAAAAAAAAAAAAAAAAAAAAAAAAAAAAAAAAAAAAAAAAAAAAAAAAAAAAAAAAAAAAAAAAAAAAAAAAAAAAAAAAAAAAAAAAAAAAAAAAAAAAAAAAAAAAAAAAAAAAAAAAAAAAAAAAAAAAAAAAAAAAAAAAAAAAAAAAAAAAAAAAAAAAAAAAAAAAAAAAAAAAAAAAAAAAAAAAAAAAAAAAAAAAAAAAAAAAAAAAAAAAAAAAAAAAAAAAAAAAAAAAAAAAAAAAAAAAAAAAAAAAAAAAAAAAAAAAAAAAAAAAAAAAAAAAAAAAAAAAAAAAAAAAAAAAAAAAAAAAAAAAAAAAAAAAAAAAAAAAAAAAAAAAAAAAAAAAAAAAAAAAAAAAAAAAAAAAAAAAAAAAAAAAAAAAAAAAAAAAAAAAAAAAAAAAAAAAAAAAA';

	return (callback,thisarg)=>{
		safariAudiotag.onended = ()=>{
			thisarg ? callback.call(thisarg) : callback();
		};
		safariAudiotag.play();
	};
})();

This creates an <audio> tag in yout HTML body with a blank sound. In your game, when the player clicks something, you can wrap whatever action you want with this call and it will play the blank sound using pure HTML/JavaScript to ensure sound is active on Safai/iOS.


The best place to do this is in your preloader (assuming you have a play button there).


Your current code might look like:


startButton.on('pointerdown', function() {
    startGame();
});

You would update that to something like:


startButton.on('pointerdown', function() {
    safariSoundHack(startGame());
});

This will tell the browser to play the blank sound, then start your game when it's completed (and Safari has enabled audio playback).


6

Posted by PsychoGoldfish - February 10th, 2020


As I've been plugging away on my Phaser Jam game, I realized I had built a couple of classes that you guys may find useful.


The first is a SimpleButton class that you can use to add basic buttons with easy-to-script input handling. The second is an InputWrapper class that lets you map multiple keys and on-screen buttons to single input names.


You can grab the files from my dump.


The two classes you will want to steal are js/SimpleButton.js and InputWrapper.js


Check out main.js to see them in action. The demo starts with a basic implementation of SimpleButton (the play button), then shows how to use InputWrapper to move a sprite left and right with multiple input sources (including on-screen buttons!).


I haven't added gamepad input in here yet, but if I do I'll be sure to update these files. It shouldn't be too difficult to figure it out if you need to add that before I get around to it.


These classes should go a long way to help some of you guys get keyboard based games working on mobile devices!


Speaking of mobile devices, I have one last tip to share.


If you are using es6 style JavaScript classes for your Phaser games, and you want to target mobile, be aware that Safari on iOS will not work right if you use class properties like so:


class SomePointlessClass
{
    static some_static_var = 123;  // this will break Safari

    some_property = "abc";  // as will this

    constructor()
    {
    	console.log(SomePointlessClass.some_static_var);
    	console.log(this.some_property);
    }
}

Safari is basically the new Internet Explorer, holding the rest of the web back with its hot garbage-ness.


Anyway, the workaround is to put any instance properties in your constructor, and add any static properties after the class definition like so:


class SomePointlessClass
{
    constructor()
    {
    	this.some_property = "abc";
    	
    	console.log(SomePointlessClass.some_static_var);
    	console.log(this.some_property);
    }
}


SomePointlessClass.some_static_var = 123;

Tags:

6

Posted by PsychoGoldfish - January 29th, 2020


I'm back with another tutorial for Phaser. This time I'm going to go over using Sprites and Animation in your games.


I'm assuming by this point you already know how to set up and test a Phaser project. If not, check out my previous guide.


There's been some changes since last time.


Before you get started, you should download this Phaser project, and open up htdocs\js\main.js. There are a few updates I've made since the last tutorial you should be aware of.


First you will notice the config.scene_names value only has one scene in it this time. I plan on keeping this tutorial fairly simple, so we'll just be loading art for a single character and playing some animations. There's no real need for a fancy preload routine this time.


Next, you will find new vars named sprite_path and config.sprite_names. This is where we define our sprite classes and their file location.


I've updated how the script adds <script> tags into the HTML body, and moved where the references to our scene classes get passed to Phaser.


These updates will let us extend the Phaser.Sprite class (more on that later) and load in the appropriate files in the same way we load our scene files.


If you decided to add additional JavaScript files, you could easily pop them in the script_paths array.


As you've probably guessed, we have also added a new directory: 'htdocs\js\sprites'. This directory is where we'll be doing most of our coding in this tutorial, in the SlimeSprite.js file.


The last notable change is instead if a 'lib' directory, I've created the following:


htdocs\lib-raw\
htdocs\lib-spritesheet\
htdocs\lib-free-sprite-sheet-packer\
htdocs\lib-texture-packer\

Each of these folders contains the same artwork; frames for a little green slime to idle and hop around. The difference is in how they are packaged. We're going to learn how to use all these different formats to do the same thing.


About that art...


For the record, I am still using an older version of Flash to do a ton of my sprite work. The .fla and .swf files are available in the Phaser project .zip file.


The 'htdocs\lib-raw\' folder contains the animations exported as a PNG sequence. I used these exported images to build the spritesheet.png files in 'htdocs\lib-spritesheet' and 'htdocs\lib-free-sprite-sheet-packer'.


The spritesheet in 'htdocs\lib-texture-packer' were generated using the .swf files (more on that later).


You can make your own art however you want, and one of these methods of handling animation will work just fine for you.


Let's Dive In!


Let's take a look at htdocs\js\scenes\SlimeScene.js


If you read the last tutorial, you should be able to follow what's going on in this file. We have a preload method where we'll load our art assets (in this case all our slime art), a create method where we'll set up the scene and add our slime sprite, and an update method that handles the game loop once everything is ready.


There's 3 main ways we can create animated sprites. We can use a bunch of individual images, use a sprite sheet, or use a texture atlas.


Using Individual Images


Let's go ahead and update the preload method first. We're going to start by loading all the individual images in the 'htdocs\lib-raw' folder.


	// Load all of our assets
	preload()
	{
		// set our load path
		this.load.path = 'lib-raw/';


		// Load the images for our idle animation
		// note, Phaser automatucally applies the .png extension to load these
		this.load.image('slime-idle0001');
		this.load.image('slime-idle0002');
		this.load.image('slime-idle0003');
		this.load.image('slime-idle0004');
		this.load.image('slime-idle0005');
		this.load.image('slime-idle0006');
		this.load.image('slime-idle0007');
		this.load.image('slime-idle0008');


		// Load the images for our hopping animation
		this.load.image('slime-hop0001');
		this.load.image('slime-hop0002');
		this.load.image('slime-hop0003');
		this.load.image('slime-hop0004');
		this.load.image('slime-hop0005');
		this.load.image('slime-hop0006');
		this.load.image('slime-hop0007');
		this.load.image('slime-hop0008');
		this.load.image('slime-hop0009');
		this.load.image('slime-hop0010');
		this.load.image('slime-hop0011');
		this.load.image('slime-hop0012');
	}

This is pretty similar to how we loaded our assets in the last tutorial. This time, however, I'm setting a load path so I don't have to include that in every image load.


I'm also only passing the filename in the load.image() call. This is sort of a shorthand for calling:

this.load.image('slime-hopXXXX', 'slime-hopXXXX.png');

If you only pass the first parameter, Phaser uses it for both values, and auto-appends the ".png" for the image value.


Next, we need to update the create method and create some animations using our images.


	// create our animations
	create()
	{
		// create our idle animation
		this.anims.create({
			// the name of our animation
			key: 'slime-idle',
			// the image name of each sequential frame
			frames: [
				{ key: 'slime-idle0001' },
				{ key: 'slime-idle0002' },
				{ key: 'slime-idle0003' },
				{ key: 'slime-idle0004' },
				{ key: 'slime-idle0005' },
				{ key: 'slime-idle0006' },
				{ key: 'slime-idle0007' },
				{ key: 'slime-idle0008' }
			],
			// the framerate to render this animation
			frameRate: 12,
			// number of times to repeat the animation, or -1 for infinite
			repeat: -1
		});


		// do the same for our hop animation
		this.anims.create({
			key: 'slime-hop',
			frames: [
				{ key: 'slime-hop0001' },
				{ key: 'slime-hop0002' },
				{ key: 'slime-hop0003' },
				{ key: 'slime-hop0004' },
				{ key: 'slime-hop0005' },
				{ key: 'slime-hop0006' },
				{ key: 'slime-hop0007' },
				{ key: 'slime-hop0008' },
				{ key: 'slime-hop0009' },
				{ key: 'slime-hop0010' },
				{ key: 'slime-hop0011' },
				{ key: 'slime-hop0012' }
			],
			frameRate: 24,
			repeat: 0
		});


		this.cameras.main.setBackgroundColor(0x00AAFF);

		// create our slime sprite
		this.slime = new SlimeSprite(this, this.cameras.main.centerX, this.cameras.main.centerY);


		// add it to the stage
		this.add.existing(this.slime);
	}

The anims.create() method takes an object containing a key we can use to play the animation, and an array of frames that will compose the animation. Each frame is an object containing a key that matches one of our loaded assets.


There are other properties you can pass in each animation and frame object that can tweak the animation. These can set independent durations for individual frames, yoyo the whole animation, etc etc. We're not doing anything that fancy here.


We ARE setting independent frameRate and repeat values. The frameRate property is the number of frames per second the animation will run at, and repeat is the number of times the animation will loop before it's considered completed and stops.


To play an animation once, the repeat value should be set to 0. If you want it to loop forever, set it to -1.


In this example, we created 2 animations: slime-idle and slime-hop.


The other things we're doing in the create() method are setting a background color, creating an instance of our custom SlimeSprite, and adding it to our scene. We'll dig in to the SlimeSprite class later.


Go ahead and test the game out now, and you should see our slime bobbing as it idles. Use the left and right arrows to watch him hop across the screen.


Using a Sprite Sheet


A sprite sheet is an image where all of your animation frames appear on a grid. This is a very common way of adding sprites, and one of the simplest options to set up in Phaser.


Let's update that preload method again to use the sheet in 'htdocs\lib-spritesheet':


	// Load all of our assets
	preload()
	{
		// Load our sprite sheet
		this.load.spritesheet('slime', 'lib-spritesheet/spritesheet.png', { frameWidth: 128, frameHeight: 128 });
	}

How about that? We only have to load ONE asset this way. It's almost exactly the same as loading an image, except we also pass an object in with rules about our grid. In this case the frameWidth and frameHeight of our individual frame images.


Phaser will use those frame sizes and create a frame sequence going from left to right, top to bottom (the image on the top left is frame 1, and the image on the bottom right is the last frame).


Phaser will now refer to this sprite sheet as 'slime'.


Next we'll update the create method:


// create our animations
	create()
	{
		// create our idle animation
		this.anims.create({
			// the name of our animation
			key: 'slime-idle',
			// the image name of each sequential frame
			frames: this.anims.generateFrameNumbers('slime', { start: 12, end: 20 }),
			// the framerate to render this animation
			frameRate: 12,
			// number of times to repeat the animation, or -1 for infinite
			repeat: -1
		});


		// do the same for our hop animation
		this.anims.create({
			key: 'slime-hop',
			frames: this.anims.generateFrameNumbers('slime', { start: 0, end: 11 }),
			frameRate: 24,
			repeat: 0
		});


		this.cameras.main.setBackgroundColor(0x00AAFF);


		// create our slime sprite
		this.slime = new SlimeSprite(this, this.cameras.main.centerX, this.cameras.main.centerY);


		// add it to the stage
		this.add.existing(this.slime);
	}

Now that we're working with a sprite sheet, we can use one of Phaser's handy methods for building frame arrays.


anims.generateFrameNumbers() takes 2 parameters. The first is the name of the sprite sheet you want frames from, the second is an object of rules.


In the .png file, the frames for the idle animation are at the end, so I am telling it to generate frame data using frames 12 through 20 for the 'slime-idle' animation.


I could do the same thing manually like so:


		frames: [
			{"key":"slime","frame":12},
			{"key":"slime","frame":13},
			{"key":"slime","frame":14},
			{"key":"slime","frame":15},
			{"key":"slime","frame":16},
			{"key":"slime","frame":17},
			{"key":"slime","frame":18},
			{"key":"slime","frame":19}
		]

Essentially the frame objects in the array tell it the key name of the spritesheet, and the frame number to show for each frame. You could also add other rules (like duration) if you did this manually.


Note: The first frame in a spritesheet is 0. In a 20-frame animation, the last frame will be 19.


You can test the game again, and it'll look and work exactly the same as before, but should load a bit quicker because we're only making ONE request for assets.


Using a Texture Atlas


A texture atlas is a lot like a spritesheet. The big difference is it does not use a static grid. Each frame is an independent rectangle within the overall image. The atlas requires both the image file, and a .json file containing all the information about where each frame rectangle is, what size it should be rendered at, etc etc.


There's a few free tools that can create Texture Atlases for you. For this tutorial, I used the one at https://www.codeandweb.com/free-sprite-sheet-packer. The assets are in 'htdocs\lib-free-sprite-sheet-packer'.


I added all the sprites in 'htdocs\lib-raw' to this tool, set the format to JSON Hash, the layout to compact and the padding to 1px.


The JSON hash format is ideal for Phaser, but you can use this tool to make atlases for other game dev frameworks, or even make compact css rules for web design.


The compact layout will usually do the best job of cramming things into the tightest space (thus keeping your image smaller).


Adding some padding will make sure you don't see any pixel bleeding from neighboring frames when you start messing with image scaling.


Update the preload function to use the atlas:


	// Load all of our assets
	preload()
	{
		// Load our sprite sheet
		this.load.atlas('slime', 'lib-free-sprite-sheet-packer/spritesheet.png','lib-free-sprite-sheet-packer/spritesheet.json');
	}

Like the spritesheet, we're loading everything in a single line, but this time it's going to load two files that work together. Also like the spritesheet, our atlas is now named 'slime'.


Next, we update the create method:


	create()
	{
		// create our idle animation
		this.anims.create({
			// the name of our animation
			key: 'slime-idle',
			// the image name of each sequential frame
			frames: this.anims.generateFrameNames('slime', {prefix:'slime-idle', start: 1, end: 8, zeroPad: 4, suffix:'.png' }),


			// the framerate to render this animation
			frameRate: 12,
			// number of times to repeat the animation, or -1 for infinite
			repeat: -1
		});
		// do the same for our hop animation
		this.anims.create({
			key: 'slime-hop',
			frames: this.anims.generateFrameNames('slime', {prefix:'slime-hop', start: 1, end: 12, zeroPad: 4, suffix:'.png' }),
			frameRate: 24,
			repeat: 0
		});


		this.cameras.main.setBackgroundColor(0x00AAFF);


		// create our slime sprite
		this.slime = new SlimeSprite(this, this.cameras.main.centerX, this.cameras.main.centerY);


		// add it to the stage
		this.add.existing(this.slime);
	}

Because an atlas doesn't use a flat grid, and doesn't necessarily put your frames in any specific visual order, we can't generate animations using frame numbers.


Thankfully, Phaser has a handy method to get around that as well: anim.generateFrameNames().


Each frame in our atlas is named after the source image that it came from. Since the first image in our idle animation is named slime-idle0001.png, the key for that frame is also 'slime-idle0001.png'.


The anim.generateFrameNames() method takes 2 params. First is the name of the atlas, 'slime. Second is an object of rules we'll use to generate the frame names.


This object contains a prefix, start and end numbers, a zeroPad value and a suffix.


All of our frames in the idle animation start with 'slime-idle' and end with '.png'. That's pretty straightforward.


Each individual frame also has the frame number with leading zeros so that the numeric value is always 4 characters long. This is why we set zeroPad to 4.


Because we are using names, it's important to note the first animation frame is named 'slime-idle0001.png' and the last is named 'slime-idle0008.png'. This is why we start at 1 (instead of 0) and end at 8 (instead of 7).


We could also create the animation frames manually like so:


		frames: [
			{"key":"slime","frame":"slime-idle0001.png"},
			{"key":"slime","frame":"slime-idle0002.png"},
			{"key":"slime","frame":"slime-idle0003.png"},
			{"key":"slime","frame":"slime-idle0004.png"},
			{"key":"slime","frame":"slime-idle0005.png"},
			{"key":"slime","frame":"slime-idle0006.png"},
			{"key":"slime","frame":"slime-idle0007.png"},
			{"key":"slime","frame":"slime-idle0008.png"}
		]

If you did this manually you could add other rules, like duration, if you needed to.


Test the game again, and you'll see it working exactly the same again.


So which method is the best?


The answer to this is a bit complicated; you have to account for a few different things.


The most obvious is file size. The more bytes you have to download, the longer your game will take to load.


Every individual file will have some meta info, like its mime-type, publication information, etc etc. You can shave a ton of this bloat using a program like PNGGauntlet but you will always see an incremental increase using individual files.


Texture Atlases have a few drawbacks with size as well. While you can put more items in a single image, unless you have the perfect amount of sprites to fill it, there will be notable chunks of wasted blank space. Each frame also adds to the .json file.


Spritesheets are fairly optimized. Yes, each sheet will have some overhead, but there is no wasted space, nor is there any .json file to worry about.


Another factor to consider is total files. Every time you have to request a file from a web server, there is some delay. The more requests you have to make to load your game, the longer it will take.


Individual files are pretty much the worst case scenario here.


As you add more sprites, texture atlases start looking better than sprite sheets.


Then you have to consider memory management. The less images you have to store in memory, the quicker your game will render. A single texture atlas will give you improved performance over multiple sprite sheets. WebGL, in particular, works best when using minimal textures.


At this point, it really comes down to spritesheets and texture atlases.


The final consideration is how you prefer to work.


If you are happy building grid-based sheets, and having to keep track of frame numbers to build animations, you'd be best sticking with sprite sheets.


You may also be downloading a bunch of pre-made sheets that you don't want to break apart to make a texture atlas. There's no shame in making less work for yourself.


If you still use Flash for your art, like I do, you may prefer using Texture Atlases.


If you use Animate CC, you have atlases as a built-in option. If you use older version of Flash, you can easily export to png sequences. Either way, you will get atlases with easy-to-use key names, and will have some tool you can use to do the dirty work of building your sheets and json files for you.


If you are using old Flash, and can afford a copy of TexturePacker, things get even better.


And now I shamelessly endorse TexturePacker!!!!!


TexturePacker just does so many things right. First off, you don't even need to export your Flash animations to png sequences. You can actually import your swf files directly, and it will process your frames automatically.


The other thing is does well is recognizing duplicate images. If you have animationa that use the same image on multiple frames, TexturePacker will only add the image to the png once, but still create the frame info for it in your json file.


Even better, TexturePacker detects white space in each of your frames and can trim it off (it gets added back in when your frame is rendered).


Unike the fee tool, TexturePacker lets you set up smart folders that will automatically find any new swf or image files you save. All you have to do is publish your sprite sheet when you are ready.


TexturePacker also has a Phaser 3 specific output format and bunch of compression options that can really shave down your file sizes. You can compare the files it produces with the free online texture packer by looking in 'htdocs\lib-texture-packer' and 'htdocs\lib-free-sprite-sheet-packer'.


Even if you prefer to use Unity or some other game development platform, texture atlases are widely supported, and TexturePacker builds them better than anything else.


You will find that TexturePacker creates slightly different frame keys than you would get manually exporting images. The first frame in our idle animation, for example, would be named 'slime-idle/0000'.


If you are interested in seeing this slime demo using a TexturePacker atlas, check out htdocs\js\scenes\SlimeScene-texture-packer.js. You can see the completed code for all of our different versions in the 'htdcos\js\scenes' folder if you like.


That about covers the image and animation stuff, so let's dive into...


Custom Sprites!


The Phaser.Sprite class lets you put an object on the stage, set an image or animation in it, scale, rotate, and resposition, etc etc. It's what makes all the interactive parts of your game.


In the same way we can extend the Phaser.Scene class, we can also extend Phaser.Sprite.


In our 'SlimeScene' class, we are creating an instance of a custom 'SlimeSprite'. You can open up 'htdocs\js\sprites\SlimeSprite.js' and see how it works.


The Sprite constructor needs a scene to be linked to. You can also pass along an x and y position to start at. This information gets passed to the superclass.


We can set up anything else we need here as well. In this case, I'm creating references to the left and right key, and setting the initial idle animation.


The update method, in this class, does NOT get called automatically like it does in a scene class. We are calling it manually in the 'SpriteScene' class when ITS update method is called.


This simple interactive sprite isn't much good for a proper game, but if you are looking at it's code there's some tidbits you might appreciate.


First, you can see how we set scaleX to either 1 or -1 to change the direction of the sprite.

You can also see how we play animations with the play() method.

And you can see how we use the once() method to add a single-use event listener, in this case for the animation complete event.


Keep Learning!


I hope I've been able to give you guys enough inspiration to really give Phaser a solid go. You still have a lot to learn, but you should have a solid enough foundation to take things to the next level.


If you are comfortable digging through code to learn how it works, you should really enjoy poking around the many exaples at https://phaser.io/examples/v3


If you still need a bit more guidance, jump over to https://phaser.io/tutorials/making-your-first-phaser-3-game and learn how to build a simple platform game!
Tags:

9

Posted by PsychoGoldfish - January 24th, 2020


Who is this for?


This intro is for anyone who wants a free tool for making web-based HTML5 games. I am assuming you have a basic familiarity with ES6 JavaScript, but any decent JavaScript knowledge should be good enough.


You can view the finished game we build in this tutorial here, and download the full source here.


What is Phaser?


Phaser is a JavaScript-based framework for building HTML5 web games. It was written by @PhotonStorm and has been in active development since 2013 (well before most of us even thought about switching from Flash to HTML5).


It's also one of my personal favorite game development frameworks. There are tutorials and examples for damn near anything you want to do, an their community is always active and helpful.


Why I prefer Phaser over other game frameworks


I think it mostly comes down to two things. I have a history with Flash and ActionScript that's shared by Phaser, and I like having as much control as possible in how I build things. I really loved the Starling framework fro ActionScript 3 games, and Phaser has a very similar workflow.


I've never been a big fan of programming game objects with drag and drop widgets or clicking baked in behaviors. I'm a bit of a control freak. Tools like Unity and Construct WILL let you code things manually, but if I'm going to be doing everything that way anyhow, I prefer to work lean.


With Phaser, you are working in pure JavaScript (or TypeScript if you prefer), so you don't have to worry about what kind of bloat some outside IDE is going to add. A simple game, like Flappy Bird, would be much smaller in size and memory use, while probably running better on lower-end hardware than the exact same game built with Unity's WebGL export.


There are drawbacks to choosing Phaser. It's a pure code library, not an IDE. You need 3rd party tools for art, animation and level design. Of course, that's not always a drawback. Because Phaser is just code, it can't crash and cause you to lose hours of work. Each tool you use may crash for whatever reason, but it will only cause you to lose maybe a single drawing or one level layout at most. It keeps you from having all your eggs in one basket.


The biggest reason I prefer Phaser is it has, hands down, one of the fastest rendering engines I've seen for web-based HTML5 games. I've had some pretty ambitious demos working at 60fps on my old low-end laptop without even using WebGL.


Getting Started


Before we get too far ahead of ourselves, there's a few things you should know before you get started. Because we are targeting web browsers with our Phaser games, we will need to run a web server.


Most modern browsers have built-in security measures that prevent local files from doing things that could be considered risky. Trying to run your game by loading it directly will almost certainly fail.


I'm a bit fan of MiniWeb since it doesn't require any real setup or server admin skills, but you could use any web server you prefer.


If you DO use MiniWeb, you need to save it to whatever directory your game will be in; let's say C:\PhaserTutorial. Next you'll need to add an 'htdocs' directory so the server knows where to find your files.


In the htdocs folder, you can add a file called "index.html". In this file, just write "Hello World" or something.


If everything is set up right, you should be able to run miniweb.exe and it will have a line saying "host" (it'll look something like 123.45.678.910:8000). Type that exact host address in your browser, and you should see your "Hello World" text.


We are also going to need to add directories for our assets (sound, art, etc) and JavaScripts. Let's go ahead and add 'lib' (asset library) and 'js' (JavaScripts) directories inside our 'htdocs' folder.


To review, you should currently have a file setup something like this:


C:\PhaserTutorial
C:\PhaserTutorial\miniweb.exe
C:\PhaserTutorial\htdocs
C:\PhaserTutorial\htdocs\index.html
C:\PhaserTutorial\htdocs\lib
C:\PhaserTutorial\htdocs\js

Now that we have a working server, and our directories are all set up, we can install Phaser. At the time this was written, you could grab the latest version of Phaser 3 here. For this tutorial, we'll be using the 'js' version. When you build a game and are ready to release it, you'll probably want to use the min.js version to get a smaller download size.


Make sure your file is saved to C:\PhaserTutorial\js\phaser.js (or wherever your 'js' directory happens to be).


Now we need to update that 'index.html' file we made earlier so it's a proper HTML5 file, and loads the Phaser library. Replace your "Hello World" text with the following:


<!doctype html>
<html lang="en">
	<head>

		<meta charset="utf-8">

		<title>My Phaser Game</title>
		<meta name="description" content="This is a Phaser Game!">
		<meta name="author" content="Your Name Here">

		<style>
			body {
				background-color: black;
				margin: 0px;
				padding: 0px;
			}
		</style>

	</head>

	<body>

		<!-- This is where we load our scripts -->
		<script src="js/phaser.js"></script>

	</body>
</html>

This is a simple HTML5 template. The <head> tag contains our title and some other meta info, along with a style tag that makes the background black, and gets rid of margins. Newgrounds runs HTML5 games in an Iframe, so we don't want any gutters making our game look goofy.


We are now ready to start building a game! (If you test your app in the browser now, you should just see a black screen)


Organizing Your Project


Note: There's no real right or wrong way to set up your Phaser project. If you've done other tutorials, you'll have seen examples where you create a Phaser instance and use functions to handle everything. I prefer to put most of my logic in Phaser scenes, and use some utility scripts to pull them all together.


This will add another layer of learning that most introductory tutorials don't add on, but I think learning how to organize your project is just as important as actually coding it.


Phaser uses scenes and Sprites for most of it's magic. These are classes that have baked in events like 'preload' and 'update' that come in very handy (we'll get into all that soon).


Before Phaser can use any scenes, you have to tell it what scene objects are available. This is done in the config object Phaser uses when it is instantiated.


And before any of your scene files can even be used, we have to load their js files. Wouldn't it be nice if we could just handle keeping track of these files in one place?


Let's create a new file in our 'js' folder named 'main.js' (C:\PhaserTutorial\js\main.js), and add the following code:


var MainConfig = (()=>{

	// loose reference
	let config = this;

	// path to our scene scripts
	let scene_path = "js/scenes/";

	// class/file names of all our scenes
	config.scene_names = [
		'InitScene',
		'PreloaderScene',
		'GameScene'
	];

	// This will be called when all our scene files have loaded and we are ready to start the Phaser game.
	function startGame() {

		config.game = new Phaser.Game({

			width: 860,
			height: 640,
			type: Phaser.AUTO,	// Render mode, could also be Phaser.CANVAS or Phaser.WEBGL
			scene: config.scene_classes // the code below will set this for us

		});
	}


	//---------- You shouldn't need to edit anything below here ----------\\

	// this will store references to our scene classes as they are loaded.
	config.scene_classes = [];

	// get the body tag in the HTML document
	let body = document.getElementsByTagName('body')[0];

	// keep track of number of loaded scenes
	let scenes_loaded = 0;

	// Loads a scene file by adding a script tag for it in our page HTML
	function loadScene(scene_name) {

		let script_tag = document.createElement('script');
		script_tag.src = scene_path + scene_name + ".js";

		// wait for the scene file to load, then check if we have loaded them all
		script_tag.addEventListener('load', ()=>{
			scenes_loaded++;
			eval("config.scene_classes.push("+scene_name+")");

			// looks like we can start the game!
			if (scenes_loaded === config.scene_names.length) startGame();
		});

		body.appendChild(script_tag);
	}

	// start loading all of our scene files
	config.scene_names.forEach((scene_name)=> {
		loadScene(scene_name);
	});

	return this;
})();

Next, edit your 'index.html' file so it knows to load your main.js file.


		<!-- This is where we load our scripts -->
		<script src="js/phaser.js"></script>
		<script src="js/main.js"></script>

This script gives you a handy array of any scenes your game will use. In this example, we'll be adding scenes called 'InitScene', 'PreloaderScene' and 'GameScene'. All of these scenes will be extensions of the Phaser.scene class.


InitScene is a very basic scene that preloads the absolute minimum assets we will need to render our proper preloader.


PreloadScene is where we will load everything else and render a proper preloader. It's also where we'll make sure sound is enabled in our game.


GameScene will be the class that controls our actual game. In a real game, you might have a TitleScene and OptionsScene, and multiple variations of GameScene as well, but we won't be doing anything that polished in this guide.


As you may have noticed in the 'main.js' file, we will be storing our scenes in "js/scenes/". You will need to add the 'scenes' directory in your js folder, then create a file for each scene, using the exact scene name as it's filename, like so:


C:\PhaserTutorial\htdocs\js\scenes\InitScene.js
C:\PhaserTutorial\htdocs\js\scenes\PreloaderScene.js
C:\PhaserTutorial\htdocs\js\scenes\GameScene.js

Add the following code to your files:


InitScene.js

class InitScene extends Phaser.Scene {

    init()
    {
    	console.log('InitScene Started');
    }

	constructor ()
    {
    	// Sets the string name we can use to access this scene from other scenes
		super({key:'InitScene'});
    }

	preload()
	{
		// This is where you would preload the elements you need to render the preloader scene
	}

	create()
	{
		console.log('InitScene Created');

		// Once the preload phase is done, we can switch to our preloader scene
		this.scene.start('PreloaderScene');
	}

}


PreloaderScene.js

class PreloaderScene extends Phaser.Scene {

	constructor ()
    {
    	// Sets the string name we can use to access this scene from other scenes
		super({key:'PreloaderScene'});
    }

    init()
    {
    	console.log('PreloaderScene Started');
    }

	preload()
	{
		// each of these events can update your preloader!
		this.load.on('progress', function (progress) {
			console.log("total progress: " + (progress * 100) + "%");
		});

		this.load.on('fileprogress', function (file) {
			console.log("loading asset: " + file.src);
			console.log("file progress: " + (file.percentComplete * 100) + "%");
		});

		this.load.on('complete', function () {
			console.log("everything is loaded!");
		});

		// Load your assets here
	}

	create()
	{
		console.log('PreloaderScene Created');

		// When our bulk assets have been preloaded, we can start our main game scene
		this.scene.start('GameScene');
	}

}


GameScene.js

class GameScene extends Phaser.Scene {

	constructor ()
    {
    	// Sets the string name we can use to access this scene from other scenes
		super({key:'GameScene'});
    }

    init()
    {
    	console.log('GameScene Started');
    }

	create()
	{
		console.log('GameScene Created');

  		// You could set a background color here...
  		this.cameras.main.setBackgroundColor(0x00AAFF);
  
  		// add whatever else you need to the scene here
  	}
  
  	update()
  	{
  		// This is your main game loop. Code in here runs on every frame tick.
  	}
  
  }


If you test your project now, you should see an 860x640 blue box. It's not fancy, but you officially have a working Phaser app.


Okay, but how does this all actually work?


Let's look at our new scripts.


main.js


This file is kind of our staging area for our Phaser game. It loads all of our scene files so we only have to update the config.scene_name array whenever we add new scenes.


This file is also responsible for instantiating our Phaser game. In the new Phaser.Game(...) call, we pass any configuration options our game needs.


We are making our game 860px x 640px, and letting Phaser automatically determine the best rendering mode to use on the user's end machine.


When the Phaser game starts, the first scene in the config.scene_name array is started by default. In this case, InitScene.


The way this script is set up, it creates a global MainConfig object. You could access the main Phaser.Game object from anywhere by using MainConfig.game.


This file is a handy place to put any other data you would like to be globally available.


InitScene.js


This is our first Phaser scene, and it is a proper ES6 subclass of Phaser.Scene (as are all of our scene classes).


The first thing to note is that we call the parent class constructor to pass along a key. This is a string that Phaser uses to label each scene internally, and you should have this in all of your scene classes. Without it, you won't be able to switch between scenes, and your game will likely crash.


The 'init' method is the first thing that's called when this scene is started. It's a good place to initialize any data you may need later in the class.


The 'preload' method gets called next. In this method, you can tell the scene what assets to load before the scene is actually created. In this scene we would load any artwork we want our PreloaderScene to use.


The 'create' method gets called when everything has been loaded and the scene is ready for action. Because this scene won't be doing anything after our preloader art is loaded, it simply tells Phaser to go to the next scene...


So, let's go ahead and tell it to load our preloader images. You can grab them here:


ng-simple-preloader-bg.png

ng-simple-play-btn.png


Save these files to your 'lib' folder (C:\PhaserTutorial\htdocs\lib\).


Update InitScene's 'preload' function:


	preload()
	{
		// Load the images for our preloader
		this.load.image('preloader_background', 'lib/ng-simple-preloader-bg.png');
		this.load.image('preloader_button', 'lib/ng-simple-play-btn.png');
	}

Once these are loaded, we can grab them using the 'preloader_background' and 'preloader_button' labels we have set.


And now we're done with this file!


PreloaderScene.js


This is the scene where we'll load the rest of our game assets and show the user a nicer preloader. As you can see, this scene has all the same methods InitScene.js had, but does a few more things within the 'preload' method.


During the preload phase of a scene, the load object (we'll get into that more later) can fire events letting us know what it is currently loading, and how far along we are.


The 'progress' event will give is a number between 0 and 1, indicating how far along the overall preload phase has gotten.


The 'fileprogress' event will update us on how far each individual file has gotten along, returning one of Phaser's file objects. This object has a bunch of properties, but you'll be most interested in file.src (the filename) and file.percentComplete (a number between 0 and 1 indicating how much has downloaded).


The 'complete' event will fire when all your files have been loaded, but before the 'create' method is called.


We'll use these events later to make a nice preloader.


First, we need a large enough file to actually see our preloader. Go ahead and download this familiar song:


Save the song to your 'lib' folder (C:\PhaserTutorial\htdocs\lib\306544_Four_Brave_Champions__FULL.mp3).


Update the preload function in PreloaderScene.js to:


	preload()
	{
		// set our background color
		this.cameras.main.setBackgroundColor(0x42484E);


		// add our preloader image and center it on the camera
		this.bg_image = this.add.image(this.cameras.main.centerX, this.cameras.main.centerY, 'preloader_background');


		// note where our dynamic/interactive stuff should go
		this.interact_point = {x: this.bg_image.x, y: this.bg_image.y + (this.bg_image.height/2) - 42};


		let loadbar_width = 224;
		let loadbar_height = 8;
		let loadbar_pad = 4;
		let loadbar_x = this.interact_point.x - loadbar_width/2;
		let loadbar_y = this.interact_point.y - loadbar_height/2;


		// create a  bg for the loading bar (doing this dynamically saves us having to add more image files!)
		let loadbar_bg = this.add.graphics();
		// color and alpha
		loadbar_bg.fillStyle(0x525961, 1);
		// position and dimensions (not position here does NOT set origin point, thats why we're using 0,0)
		loadbar_bg.fillRect(0, 0, loadbar_width + loadbar_pad*2, loadbar_height + loadbar_pad*2);
		// move the bar where we want it
		loadbar_bg.x = loadbar_x - loadbar_pad;
		loadbar_bg.y = loadbar_y - loadbar_pad;


		// do the same for the loading bar itself
		let loadbar_bar = this.add.graphics();
		loadbar_bar.fillStyle(0xD2D8E3, 1);
		loadbar_bar.fillRect(0, 0, loadbar_width, loadbar_height);
		loadbar_bar.x = loadbar_x;
		loadbar_bar.y = loadbar_y;


		// start the bar at 0% width
		loadbar_bar.scaleX = 0;


		// update the progress bar width with each progress event
		this.load.on('progress', function (progress) {
			loadbar_bar.scaleX = progress;
		});


		// remove the progress bar when everything has loaded
		this.load.on('complete', function () {
			loadbar_bar.destroy();
			loadbar_bg.destroy();
		});


		// Load your assets here
    	this.load.audio('castle_crashers_theme', 'lib/306544_Four_Brave_Champions__FULL.mp3');
	}

Now when you test the game, you'll see our preloader just before GameScene is started.


Now we can make our game play the Castle Crashers theme!


GameScene.js


This part is simple. Just update the 'create' method to:


	create()
	{
		// add the Castle Crasher theme to the scene
		this.cc_theme = this.sound.add('castle_crashers_theme');
		// and play it on a loop
		this.cc_theme.play({loop: true});


		// Lets change the background again too so you can see something happened
		this.cameras.main.setBackgroundColor(0x00AAFF);
	}

Now when you test your game, you'll see the preloader, then our blue screen and hear the Castle Crashers theme! Or wait, will you?


Most modern browsers actually won't let your game play sound without some sort of user interaction. So it would appear we need to make the user click on our game before we need to play any sounds. The easiest place to do that is back in our preloader.


So, let's edit PreloaderScene.js again. This time, replace the 'create' method so adds a play button instead of auto-starting the GameScene.


	create()
	{
		let play_btn = this.add.image(this.interact_point.x, this.interact_point.y, 'preloader_button');
		// make the button interactive
		play_btn.setInteractive();
		// add some alpha for the default state
		play_btn.alpha = 0.9;


		// remove alpha on hover
		play_btn.on('pointerover', ()=>{
			play_btn.alpha = 1;
		});


		// add alpha on roll out
		play_btn.on('pointerout', ()=>{
			play_btn.alpha = 0.9;
		});


		// start the GameScene when the button is clicked. Bonus - this will enable audo playback as well!
		play_btn.on('pointerup', ()=>{
			this.scene.start('GameScene');
		});
	}

Now when you test your game, you should see the preloader, have to click 'PLAY', and THEN you'll hear the music!


This is all great, but when do we actually make a game?


I realize we've done a lot of stuff here and haven't really even made anything resembling a game now, but there's a pretty good reason for that.


First of all, you now know how to create and switch scenes. You should be able to import images, sound files and add them to your screen. You should be able to make a basic button, and loop music. That's a lot of stuff you'll be needing to make any sort of game!


Second, you know how to make a pretty preloader so your users won't think your game is broken because it's a just blank screen for several minutes.


Third, you could save what we have done so far and use it as a boiler plate for any future projects and not have to build a preloader or scene manager from scratch ever again!


You're welcome.


Thanks, I Guess... But how about the game part?


Okay, you've made it this far, so I guess we can bang out super basic game.


Let's grab some more assets and put them in our 'lib' folder (C:\PhaserTutorial\htdocs\lib\).


cat-head.png

cheezeburger.png


Open up PreloaderScene.js again, and add these lines to the end of the preload function:


    	this.load.image('cat_head', 'lib/cat-head.png');
    	this.load.image('cheezeburger', 'lib/cheezeburger.png');

And finally, replace all the code in GameScene.js with this:


class GameScene extends Phaser.Scene {

	constructor ()
    {
		super({key:'GameScene'});
    }

	create()
	{
		// add the Castle Crasher theme to the scene
		this.cc_theme = this.sound.add('castle_crashers_theme');
		// and play it on a loop
		this.cc_theme.play({loop: true});

		// Lets change the background again too so you can see something happened
		this.cameras.main.setBackgroundColor(0x00AAFF);

		// add the player sprite
		this.player = this.add.image(this.cameras.main.centerX, this.cameras.main.centerY, 'cat_head');

		// add the cheeseburger sprite somewhere off-screen
		this.cheezeburger = this.add.image(-9999, 0, 'cheezeburger');

		// set a cool time for cheezeburger respawn
		this.cheezeburger_cooldown = 80;

		// set the initial cool time for the cheezeburger
		this.cheezeburger_cooltime = this.cheezeburger_cooldown;

		// set how fast the player can move
		this.player_speed = 20;

		// handy container for our keyboard keys
		this.controls = {
			up: 	this.input.keyboard.addKey('UP'), // up arrow
			down: 	this.input.keyboard.addKey('DOWN'), // down arrow
			left: 	this.input.keyboard.addKey('LEFT'), // left arrow
			right: 	this.input.keyboard.addKey('RIGHT') // right arrow
		};

		// this is our score counter
		this.score = 0;

		// and this is our score text
		this.scoretext = this.add.text(5, 5, "Score: "+this.score);
		this.scoretext.setStyle({
			fontSize: "26px",
			fontFamily: "Arial Black"
		});
	}

	update()
	{
		// up and down movement
		if (this.controls.up.isDown) {
			this.player.y -= this.player_speed;
			// screen wrap
			if (this.player.y < 0) this.player.y = this.cameras.main.height;
		} else if (this.controls.down.isDown) {
			this.player.y += this.player_speed;
			// screen wrap
			if (this.player.y > this.cameras.main.height) this.player.y = 0;
		}

		// up and down movement
		if (this.controls.left.isDown) {
			this.player.x -= this.player_speed;
			// screen wrap
			if (this.player.x < 0) this.player.x = this.cameras.main.width;
		} else if (this.controls.right.isDown) {
			this.player.x += this.player_speed;
			// screen wrap
			if (this.player.x > this.cameras.main.width) this.player.x = 0;
		}

		// check our cheezeburger cool time
		if (this.cheezeburger_cooltime > 0) {
			this.cheezeburger_cooltime--;
			if (this.cheezeburger_cooltime < 1) {
				this.spawnBurger();
			}
		}

		// check for collision with cheezeburger
		// (note, we aren't using physics here, just checking distance with pythagorean theorem)
		let cheezeburger_distance = Math.sqrt(
			Math.pow(this.player.x - this.cheezeburger.x, 2) + Math.pow(this.player.y - this.cheezeburger.y, 2)
		);

		if (cheezeburger_distance < 60) this.eatBurger();
	}

	//------------------- custom methods -------------------\\

	// handles "spawning" the burger
	spawnBurger()
	{
		// put the burger somweher random within camera bounds
		this.cheezeburger.x = Math.round(Math.random() * this.cameras.main.width);
		this.cheezeburger.y = Math.round(Math.random() * this.cameras.main.height);
	}

	// handles "eating" the burger
	eatBurger()
	{
		// update the score
		this.score++;

		// move the burger off-screen
		this.cheezeburger.x = -9999;

		// reset the cool time
		this.cheezeburger_cooltime = this.cheezeburger_cooldown;

		this.scoretext.setText("Score: "+this.score);
	}

}

In this version of the file, we're adding all our assets to the scene in the 'create' function, and setting a bunch of instance values that other functions will have access to. You are also adding text for the first time here!


In our 'update' function, we're handling all the player movement, collision detection and burger spawn time.


At the end of the file, we've added some custom methods that get called by our game loop. We could have put this code right in the 'update' function, but I wanted to illustrate how you can expand the core abilities of the scene object and organize your code a bit more.


If you test the game now, you should be able to control the cat and have him haz cheezeburgers.


This is an extremely basic game, but you should have a pretty good grasp on how to start your own Phaser project by now.


As you dive a bit deeper, you'll earn how to use the physics models to handle proper collisions and things like that. You'll learn how to make sprite sheets (or better yet, texture atlases) so you aren't loading as many image files. You'll learn how to use Sprites and animate them, and so much more.


Be sure to check out all the great resources at http://phaser.io/learn and follow me on Newgrounds for any further Phaser stuff I may post about!


Tags:

12

Posted by PsychoGoldfish - May 24th, 2019


I've been playing with the Alpha version of Wick Editor off and on since the Wick Editor Game Jam announcement. Out of the gate, it had a lot of deal-breaking issues. Thankfully @luxapodular and @zrispo are very serious about making this game jam a great experience and have really stepped up.


They have been busting ass for the past week to get the Alpha Version up to stuff for the game jam. It's still not quite as intuitive as the other version, but if you are just starting with Wick, I would recommend sticking to the Alpha version because the other one will not have a lot of support going forward. The fixes they have released have changed the Alpha build from being unusable as a game development tool to being just good enough to make some fun, innovative stuff.


That said, there are still a lot of things the older "Live" version does better, so they've lifted the restriction on having to use the Alpha version for the game jam. They also extended the deadline to July 7 to make up for the rough launch.


There are a few more major updates that coming (as of the time of this post), but it's updated enough to at least start learning the basics. @luxapodular released a great tutorial video that should get most people started: https://www.youtube.com/watch?v=cvANBF43KsY&feature=youtu.be


If you've been keeping up with the Alpha's development, or breezed through the tutorial, you may be interested in some of the more advanced concepts and lessons I've come up with.


Helpful Hints


"this" context


If you read my last news post, I went into detail about how the "this" context works in Wick. The Alpha version handles scoping pretty much the same way. If you edit code on a frame, 'this' refers to the frame. If you edit a script on an interactive clip, "this" refers to the clip. If you edit a frame within an interactive clip's internal timeline, "this" still refers to the frame. To control the clip in that case, you can use "this.parentClip".


"script execution order"


When working with different scripts on different objects and layers, it's really important to understand the order in which they will execute.


Execution starts with your top layer, and works down. Each frame will execute it's 'Default' script, then it's 'Load' script, before moving down to the next frame.


Once each frame has called it's scripts, any scripting on clips will fire next. Again this will execute from the top layer down. First, a clip will execute it's 'Default' script, then it's 'Load' script. If your clip's inner timeline has any frame scripting, this will fire next, in the same order your root frames did. Once everything inside your clip has executed, the next clip will have it's scripts executed.


The 'Update' scripts will not start on any frame or clip until the last 'Load' script has completed. 'Update' execution works in the same recursive top-down order as the previous scripts did.


All other scripts are event based, and pretty self-explanatory.


Always be mindful of the execution order. If you create any global objects or methods multiple clips and frames will be calling in their 'Default' or 'Load' events, make sure you have defined them in a higher layer!


"Live preview quirks"


One of the neat features in the Alpha version is that you can test your game from any frame without having to start from the beginning. This is because the editor IS actually your game, it's just not firing any events until you hit the play button to test it.


One unintended side effect of it working this way is that any global values or clip propertied you set, stay set even after you stop testing your game.


If you start a new project, and put the following code on frame 1's Default script:

if (globalValue) {
  
  alert('globalValue is already set');

} else {

  alert('globalValue has been created');
  globalValue = 1; // note that I am only setting it if it doesn't already exist

}


The first time you test your movie, you will get an alert saying "globalValue has been created". The next time you test, you will get an alert saying "globalValue is already set".


Also note: If you ran this test, and opened another .wick file without refreshing the browser, globalValue would still be set.


If you reload the browser and start a new project, you can also see another way this quirk can be a problem.


On frame 1's Default script, pop this code in:


HelloWorld = "Hello you sexy Newgrounds fans!";

DO NOT test your game yet. Make a new keyframe at frame 2 and put the following:


alert(HelloWorld);
stop();

While you are still on frame 2, test your game. You will get an alert that says "undefined". This is because you haven't executed the scripting on the first frame yet, so HelloWorld is not defined.


If you go back to frame 1 and test, it will all work as expected. You can also go to frame 2 and test again, and since HelloWorld has been set globally, it will also work.


Start another new project. On frame 1, draw a circle and make it into an interactive clip. On the clip's Default script, put the following:


alert(this.internalValue);
this.internalValue = "Testing 123";

The first time you test your movie, you will get an alert saying 'undefined'. But after that alert, your clip will have an 'internalValue' property set on it, and the alert will say "Testing 123".


If you use global variables or add properties to Wick objects, you need to be very aware of this quirk when testing. The Wick team is planning on adding a way to test your project in a new, sandboxed instance, like the old Live version did. Until then, make sure your scripts are defining all your properties, and that you test your game from whatever frame you need to have everything reset properly.


And for the love of god, do NOT use SetInterval loops right now. They will keep running after you test your game, and if you aren't clearing them anywhere, they each time you test you will add another loop on top of the one that's already going.


Asset Management


In my last post, I also shared some experimentation I did with ways to manage assets and minimize memory while doing so. I've been playing with the same concepts on the Alpha version, and have another example of how you might build an asset library. This time I incorporated clip recycling.


In my experience, there is always some cpu overhead whenever an engine like this creates an instance of a game object. This example lets you store clips in recycle bins so when you need to use them again, they are already created.


Just like last time, you'll want to make a Default script that handles all your assets on frame 1 of your top layer. Here's the script I came up with (full of comments about what everything does). If you don't really care how it works, you can just copy/paste it and scroll down for examples of how to use it.


// This object will handle our clip library
library = {
  
  // this is the total number of each clip type that can be stored
  // in the recycle bin.
  max_recycled: 10,


  // all our clips and their meta info will be stored here
  items: {},


  // clears everything out of the library
  flush: function(name) {
    if (name) {
      delete library.items[name];
    } else {
      library.items = {};
    }
  },
  
  // clears recycled clips from the library.
  flushRecycled: function(name) {
    if (name) {
      library.items[name].recycle = [];
    } else {
      for(var i in library.items) {
        library.flushRecycled(i);
      }
    }
  },
  
  // adds a clip to the library (or returns false)
  add: function(name,clip) {
    
    // all clips will try calling this method by default
    // so this will return false to let the calling clip know
    // it is not the master copy.
    if (typeof(library.items[name]) !== typeof(undefined)) return false;
    
    // if we get here, this is the master copy. We need
    // to store it and create a recycle bin for it's type.
    library.items[name] = {clip:clip, recycle:[]};
    
    // and now this clip no longer needs to be on our stage at all.
    clip.remove();
    
    // return true so the calling clip knows it is the master copy.
    return true;
  },
  
  // removes a clip from the stage and stores it in the
  // appropriate recycle bin (if there's room) so it can be reused.
  // Note: clips will have a native recycle() method added to them
  // via addToFrame, so you shouldn't need to call this directly.
  recycle: function(name,clip) {
    
    // can't recycle things with no library records
    if (typeof(library.items[name]) === typeof(undefined)) {
      // just remove it
      console.warn('Attempted to recycle a clip with no matching library record: ', name);
      clip.remove();
      return false;
    }


    // used to tell the calling script if this was actually added
    // to the recycle bin
    let recycled = false;
    
    // Put it in the recycle bin if there is room
    if (library.items[name].recycle.length < library.max_cached) {
      
      // if clip has a recycle event handler, call it now.
      // I do it here in case you need to access the parent frame or
      // anything before the clip gets removed.
      if (clip.___custom_events.recycled) clip.___custom_events.recycled.call(clip);
      library.items[name].recycle.push(clip);
      recycled = true;
    }
    
    // remove the clip.
    clip.remove();
    
    return recycled;
  },
  
  // gets a copy of the clip and adds it to the desired frame.
  // if force_new isn't true, will attempt to use a recycled copy.
  addToFrame: function(name, frame, force_new) {
    
    // can't add clips that aren't in the library
    if (typeof(library.items[name]) === typeof(undefined)) return;
    
    let clip;
    
    // see if we can use the recycle bin...
    if (!force_new && library.items[name].recycle.length > 0) {
      clip = library.items[name].recycle.pop();
      
    // create a new copy of the clip
    } else {
      
      // Clone the clip. Note: clip must be on a frame to clone it
      frame.addClip(library.items[name].clip);
      clip = library.items[name].clip.clone();
      library.items[name].clip.remove();
      
      // tell the clip what it's named in the library
      clip.___libname = name;
      
      // add a native recycle method to the clip
      clip.recycle = function() {
        library.recycle(this.___libname, this);
      };
    }
    
    // add the clip to the frame
    frame.addClip(clip);
    
    // if the clip has an added event handler, call it now
    if (clip.___custom_events && clip.___custom_events.added) clip.___custom_events.added.call(clip);
    
    // return the clip reference
    return clip;
  },
  
  // This method lets you apply methods from a single object, to
  // any copies of your clip. It should help keep memory optimized and
  // let you organize your code however you prefer.
  applyMethods: function(clip, methodObject, onEvent) {
    
    // if this is a recycled clip, we can skip all of this.
    if (clip.___custom_events) return;
    
    // we have a few custom methods that aren't native to Wick
    // this sets those up.
    let custom_events = ['added','recycled'];
    clip.___custom_events = {};
    
    // check our methodObject for all it's values
    for(var i in methodObject) {
      
      // if the value is 'extend', we treat it like a
      // class extender and just apply all the values verbatim.
      if (i === 'extend') {
        for(var e in methodObject[i]) {
          clip[e] = methodObject[i][e];
        }
      // if the value matches one of our custom events, store
      // it in our custom object
      } else if (custom_events.includes(i)) {
        clip.___custom_events[i] = methodObject[i];
      
      // anything else, we just assume is the name of a
      // native Wick event, and set up an onEvent handler
      } else {
        onEvent(i, methodObject[i]);
      }
    }
    
    // This clip will already be on the stage, so we call
    // the 'added' handler (if it has one)
    // to ensure it gets initialized properly
    if (clip.___custom_events.added) clip.___custom_events.added.call(clip);
  }
};

To use the library script, you need to create an interactive clip to represent a game object, and a JavaScript object containing any code your asset needs. You can simply code for the baked in Wick events like 'update' and 'mouseclick', or use the 'added' and 'recycled' events that the above library script will add to the mix.


Here's an example JS object that will make a clip start at the left side of the screen, move right, then remove itself when it reaches the end of the screen. Just for fun, we'll also make it remove if we click on it.


FlyingThing = {
  
  // We could use Wick's "load" event, but that will only fire the first time a clip is
  // created.  "added" fires any time the library adds the clip to a frame.
  added: function() {
    this.x = 0; // start on the left
    this.y = root.height / 2; // center vertically
  },

  // this will use Wick's baked in 'update' event
  update: function() {

    this.x += 20;

    // check if the clip has reached the end of the stage...
    if (this.x > root.width) {
      // Our library script adds a recycle method to any clips it creates!
      // This will remove the clip from the stage, but keep it so we can reuse it later.
      this.recycle();
    }

  },

  // uses Wick's 'mousedown' event
  // TIP: mousedown/mouseup work better than mouseclick if you are trying to click moving objects
  mousedown: function() {
    // remove the clip if we click it.
    this.recycle();
  }

}

So now we have an object with scripts that can control a clip. The next step is to create an interactive clip. For simplicity sake, just make a circle. On your clip's Default script, put the following code:


if (!library.add('flying_thing',this)) {
    library.applyMethods(this,FlyingThing,onEvent);
}

There's a few things going on here. The first line calls library.add, and passes a string (flying_thing) and a reference to the clip itself. This tells the library we will be referring to this clip as 'flying_thing' when we want to create instances of it.


When the library script creates clones of our clip, this script would run again, which is why it is wrapped in an if statement. Once a clip name is set in the library, calling library.add will return false. When this runs on our master clip, it will actually remove the clip from the stage and keep it in memory. You don't have to worry about hiding it, or keeping in on a super long frame like the example in my last post.


The next line of code only gets executed the first time a clip is added to the library. This line tells the library to apply the methods in our FlyingThing object to the new copy. We pass a reference to the clip, the behavior object, and the onEvent method. That part is important, because the library needs to be able to run onEvent to set any baked-in wick event handlers.


So now we have a 'flying_thing' asset in our library. Make a new frame, and put the following code on the Default script:


onEvent('keypressed', function () {
  // check if spacebar was pressed
  if (key === " ") {
    // add a copy of our flying_thing to the frame
    let thing = library.addToFrame('flying_thing', this);
  }
});

Now, whenever we push the space bar, our script will call library.addToFrame(). The first parameter tells it wich asset we want, and the second tells it what frame to add to. In this case we just use 'this' for the current frame.


IMPORTANT NOTE:

When your library script is run, it creates a global variable. Any time you add an asset to the library, that reference will stay in memory, as will any recycled copies, unless you run your game from frame 1 again. Running from frame 1 will re-declare the library object, leaving the old one for garbage collection.


You don't need to test your game from frame 1 unless you have made any changes to your clip or its behavior object. If you test your game, and see old versions of things, this will be what happened.


Also, if you haven't run the game starting at frame 1 at all, but test from a later frame, the library object will be undefined and cause problems.


So, lets just go ahead and test our game from frame 1 to be safe. When your game is ready, go ahead and hit the space bar a few times. You should see a copy of your clip move across the screen each time you hit space.


Cool right?


But that's not all this library script can do. You can add a 'recycled' method to your behaviors and maybe use that to update a score. You can add 'mousehover' and 'mouseleave' events to change the view of your clip.


The other cool thing you can do is extend the clip itself and add new methods and properties. You do this by adding an 'extend' object in your behavior object.


Let's say my game was going to have multiple ways to "kill" an object. I would probably want a single function that handled the object's death. I would start by adding this to our behavior object:


  extend: {
    killMe: function() {
      // here I could play a sound, update a score, whatever...
      this.recycle();
    }
  }, 

And then I would update our existing mousedown method to use our new killMe function.


  // uses Wick's 'mousedown' event
  // TIP: mousedown/mouseup work better than mouseclick if you are trying to click moving objects
  mousedown: function() {
    // remove the clip if we click it.
    this.killsMe();
  }

Now anything else that can kill the clip could do so by calling clip.killMe().


You can see a similar demo in action if you download this .wick file and open it at https://alpha.wickeditor.com/


This demo also shows how it plays with different layers, so you can get an idea on how you'd handle foregrounds and backgrounds.


ANOTHER NOTE:

The Wick team is planning on adding some sort of library management in the future. Don't be surprised if this library becomes obsolete. Either way, it was a fun experiment, and may be useful to people using the current build for the game jam!


8